Converting the Amicus Small Firm Edition Database
Creating a Hyper-V Virtual Machine
- Open Hyper-V Manager
- First, open Hyper-V Manager by clicking the "start" button and typing "hyper", then select Hyper-V Manager from the list.
- Under the name of your PC on the right side, select: New > Virtual Machine
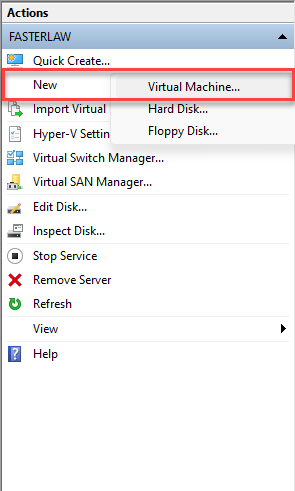
Virtual Machine Wizard
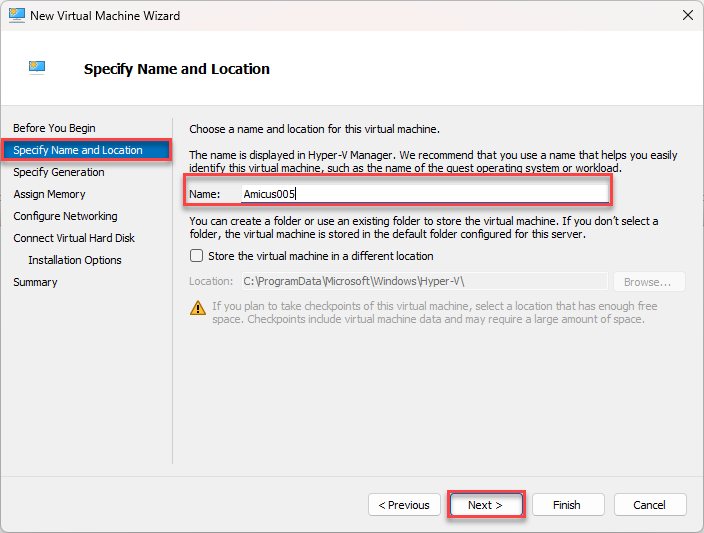
- Specify Name and Location: Give your virtual machine a name. Leave other fields as default. Click Next.
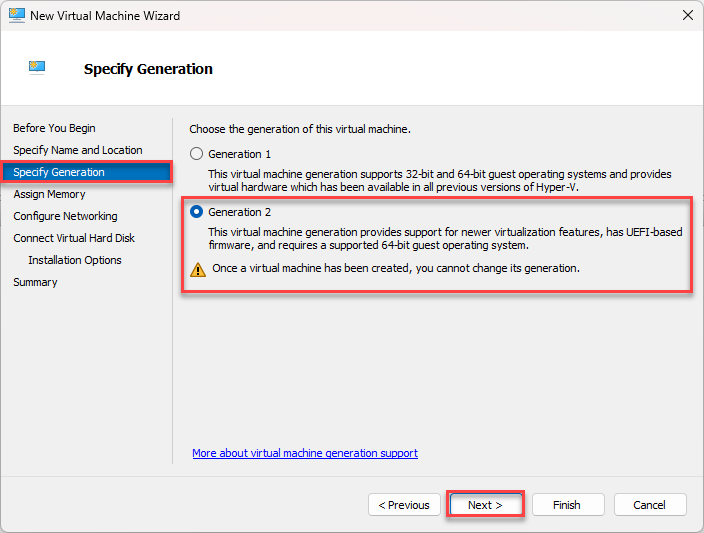
- Specify Generation: Select "Generation 2". Click Next.
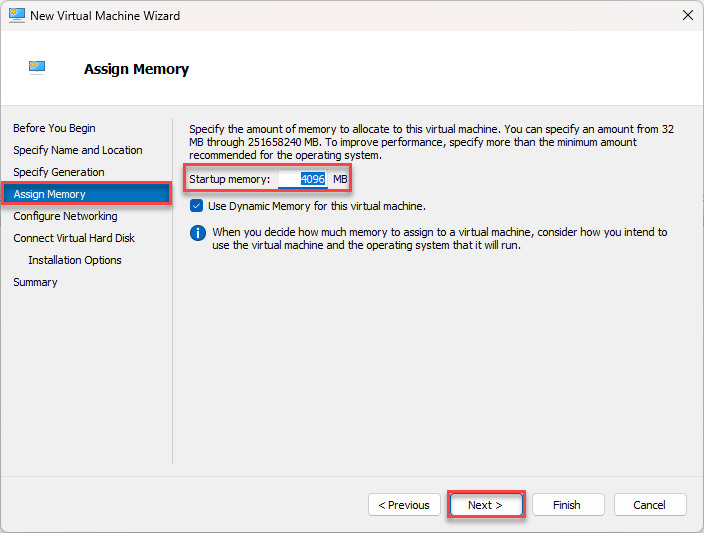
- Assign Memory: Enter "4096" into the startup memory test field. Click Next.
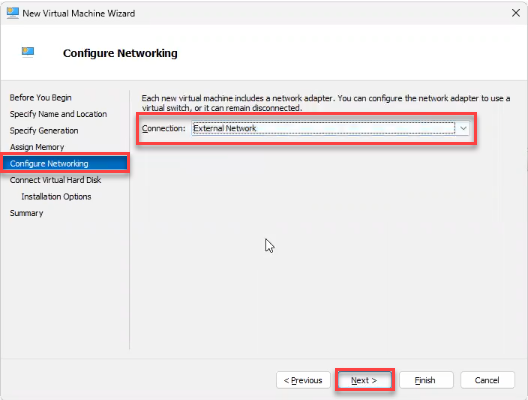
- Configure Network: In the Connection drop down, select "External Network". Click Next.
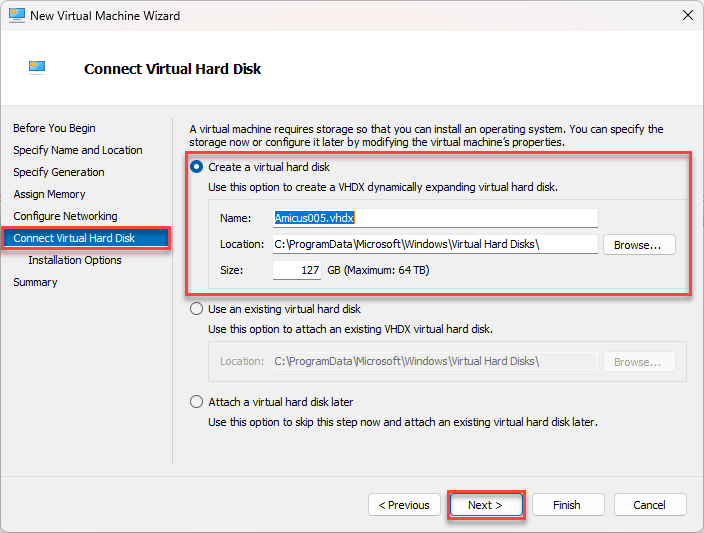
- Connect Virtual Hard Disk: Leave all fields as default. Click Next.
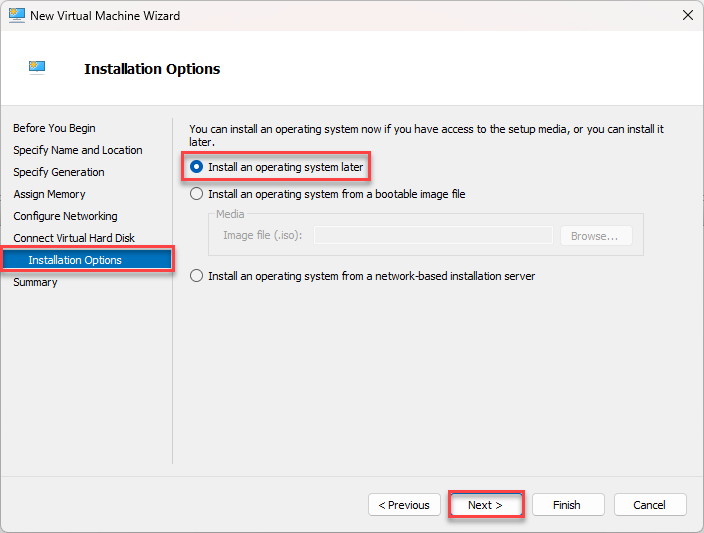
- Installation Options: Select "Install an operating system later". Click Next.
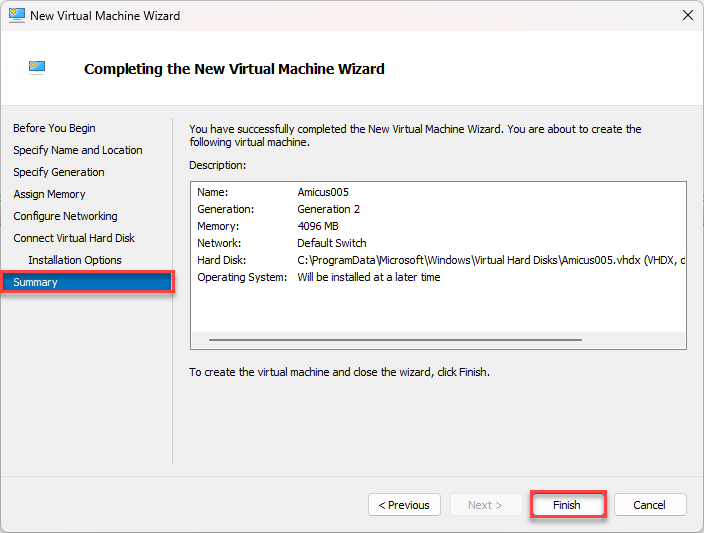
- Summary: Confirm what you have set. Click Finish. Virtual Machine is created.
Required Downloads
- This setup process will require a few different files. Download the required files to your local computer from here. These downloads include:
- Amicus Installer.zip
- Amicus - Rebuild Index.zip
- SQL Server 2005 Compatibility Features.zip
- SQL Server 2014.iso
- Windows Server 2022.iso
Customize Virtual Machine Further
- Right click on your virtual machine and select "Settings"

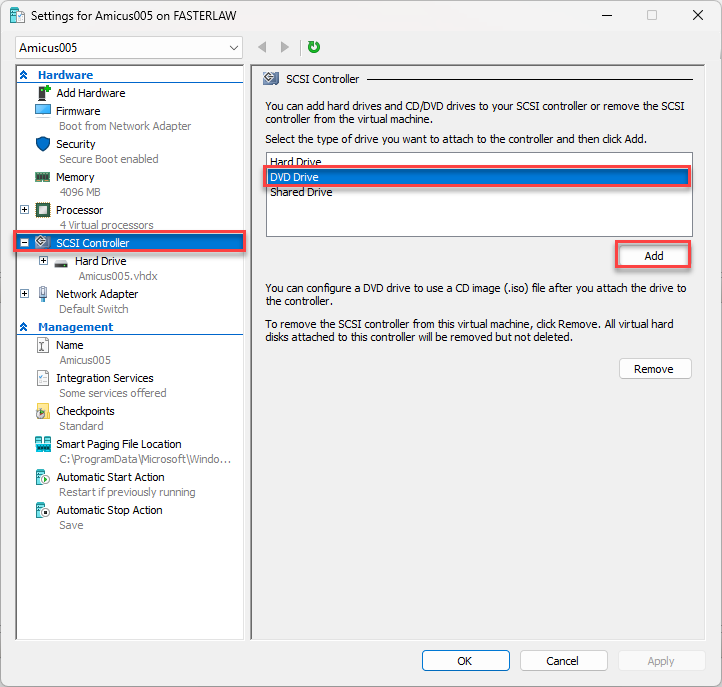
- SCSI Controller: In SCSI Controller settings, select "DVD Drive". Click Add.
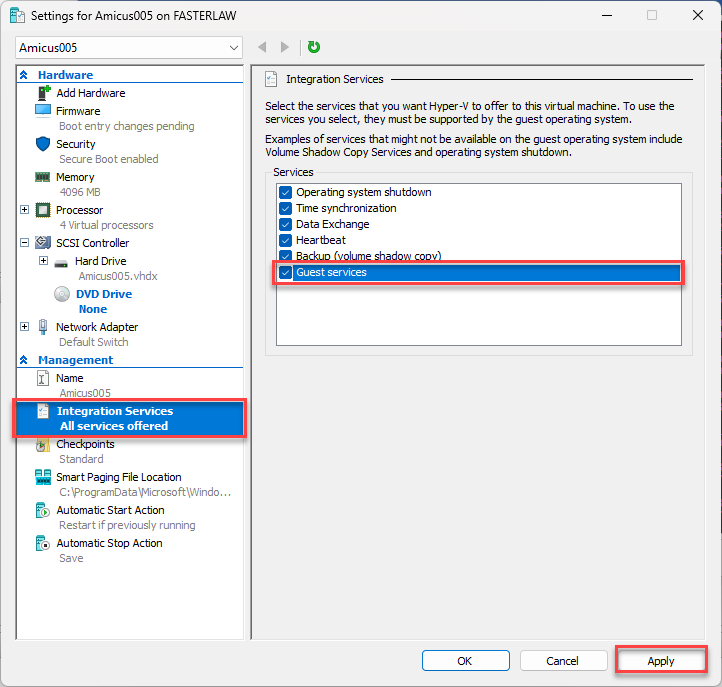
- Integration Services: In Integration Services settings, check "Guest Services". Click Apply.
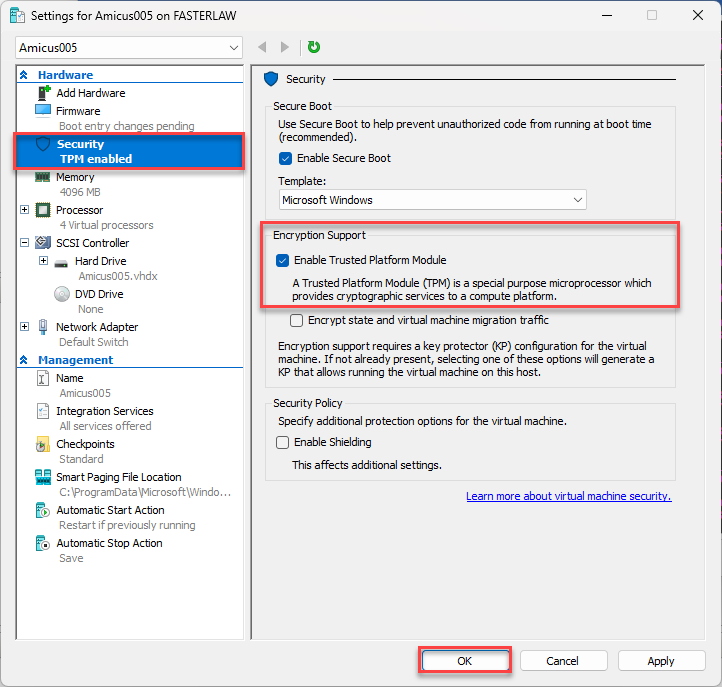
- Security: In Security settings, check "Enable Trusted Platform Module". Leave all other fields as default. Click OK.
- Re-open Virtual Machine Settings

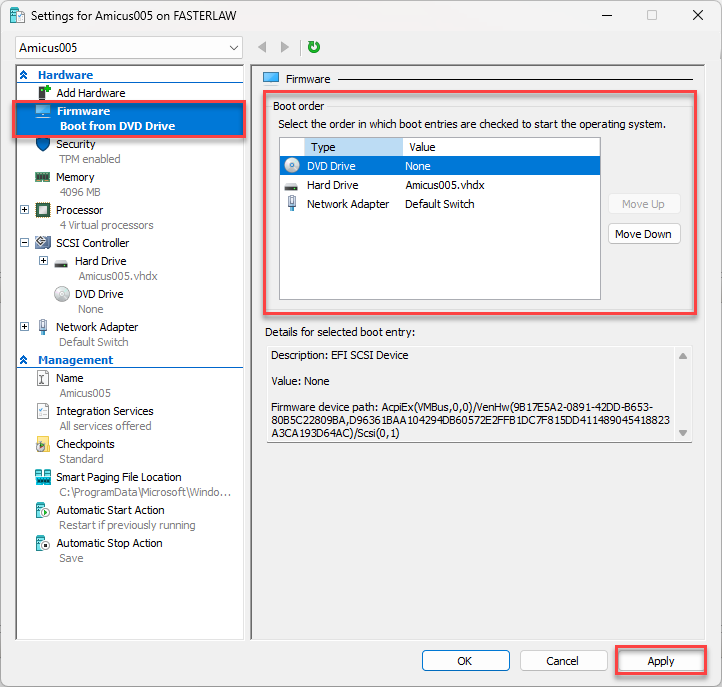
- Firmware: In Firmware settings, set Boot order to the following: DVD Drive, Hard Drive, Network Adapter. Click Apply.
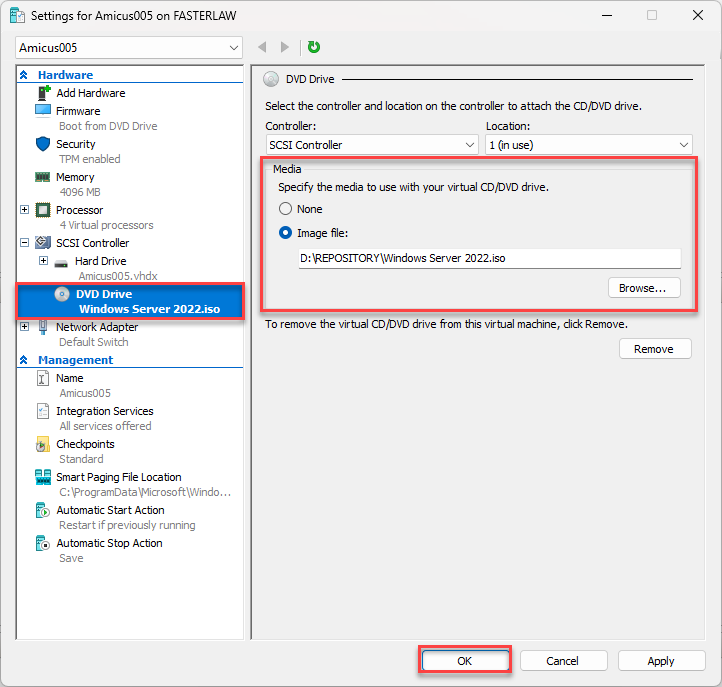
- DVD Drive: In DVD Drive settings, select "Image file", click Browse. Select the Windows Server 2022.iso file from your local computer. Click OK.
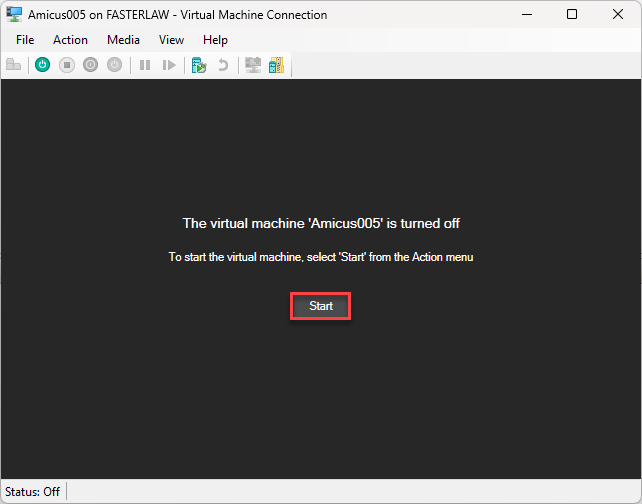
- Start Virtual Machine: Double click on your Virtual Machine. Click Start.
- Upon clicking "Start" you will need to quickly press the "Enter" key when the next screen flashes in order for the Virtual Machine to start properly.
Microsoft Server Operating System Setup
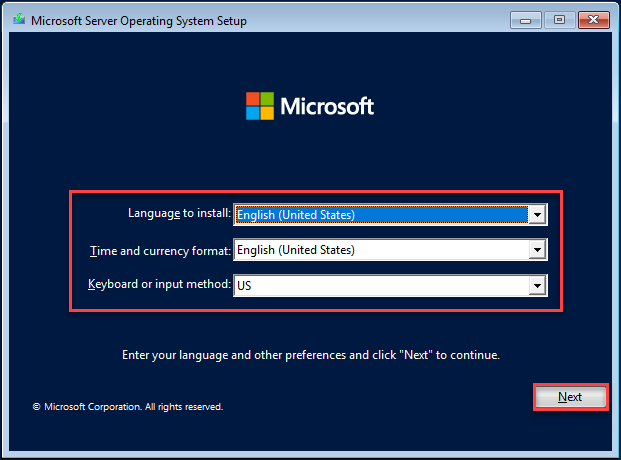
- Microsoft Server Operating System Setup: Select your desired language, time and currency format, and keyboard. Click Next.
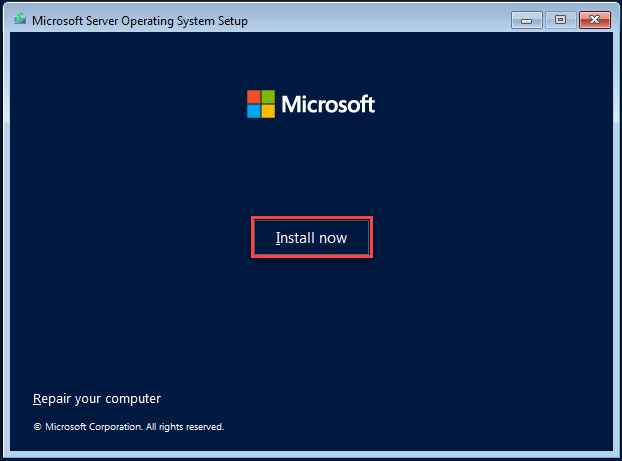
- Click Install Now.
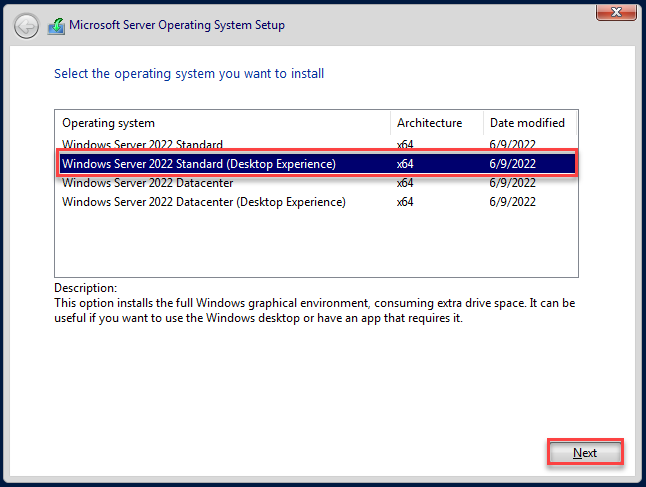
- In the operating system options, select "Windows Server 2022 Standard (Desktop Experience)". Click Next.
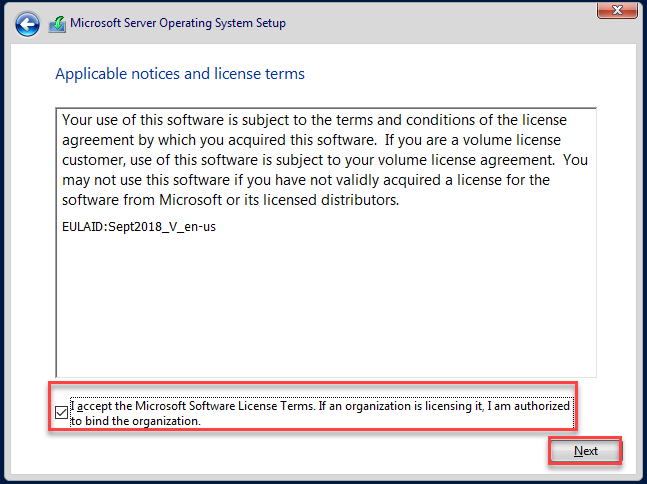
- Accept License Terms. Click Next.
- Select "Custom: Install Microsoft Server Operating System Only (advanced).

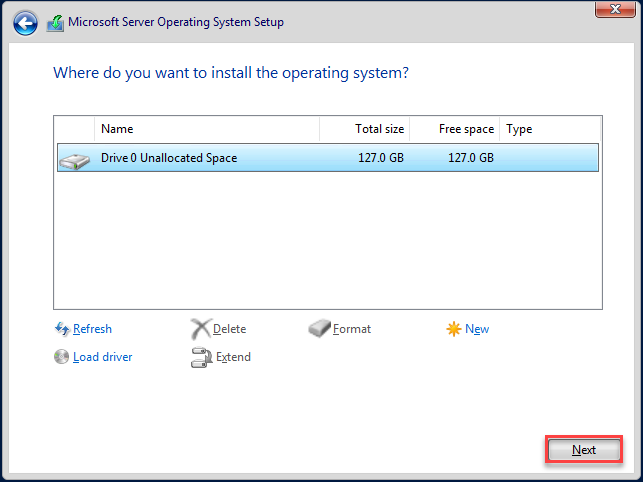
- Select your drive. Click Next.
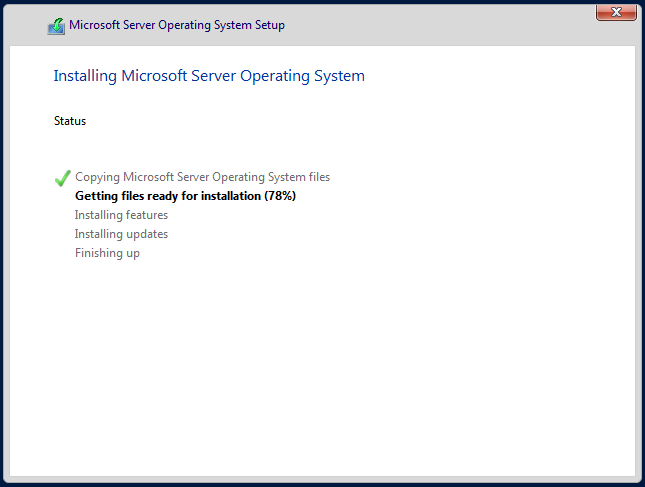
- Finish Installation.
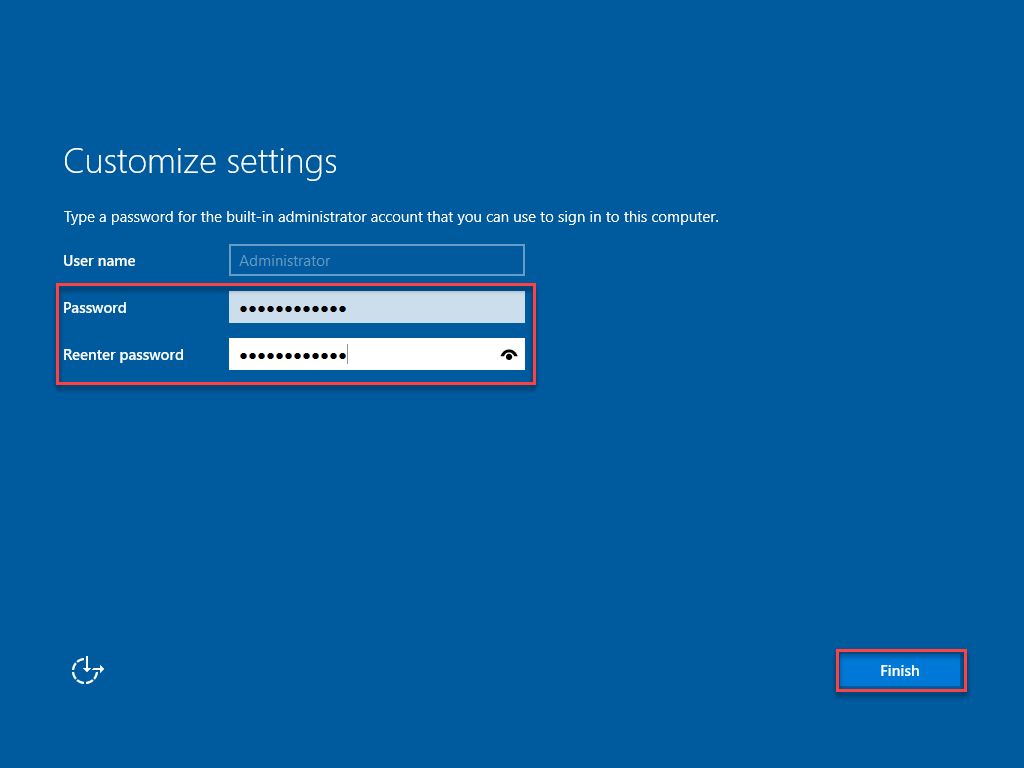
- Customize Settings: Give your Virtual Machine a user password. Click Finish.
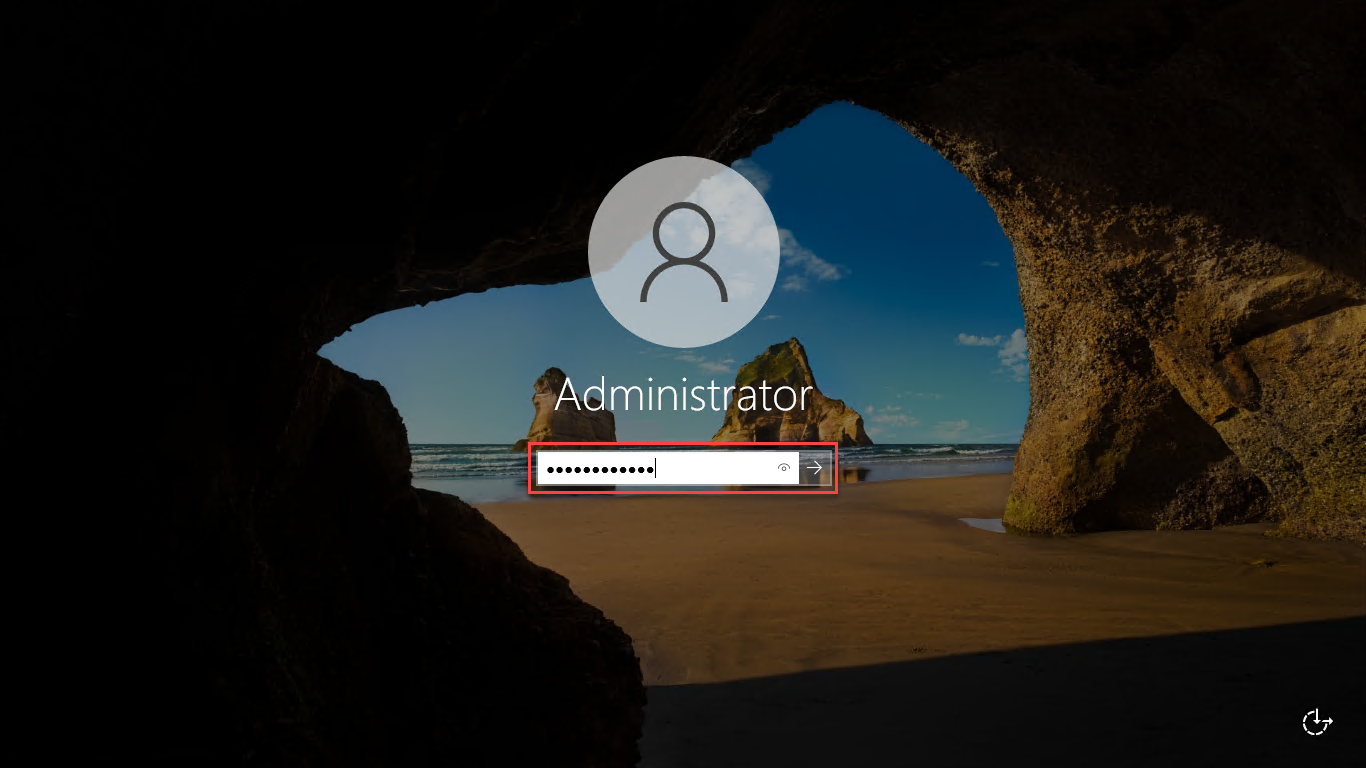
- Enter your password.
Server Manager
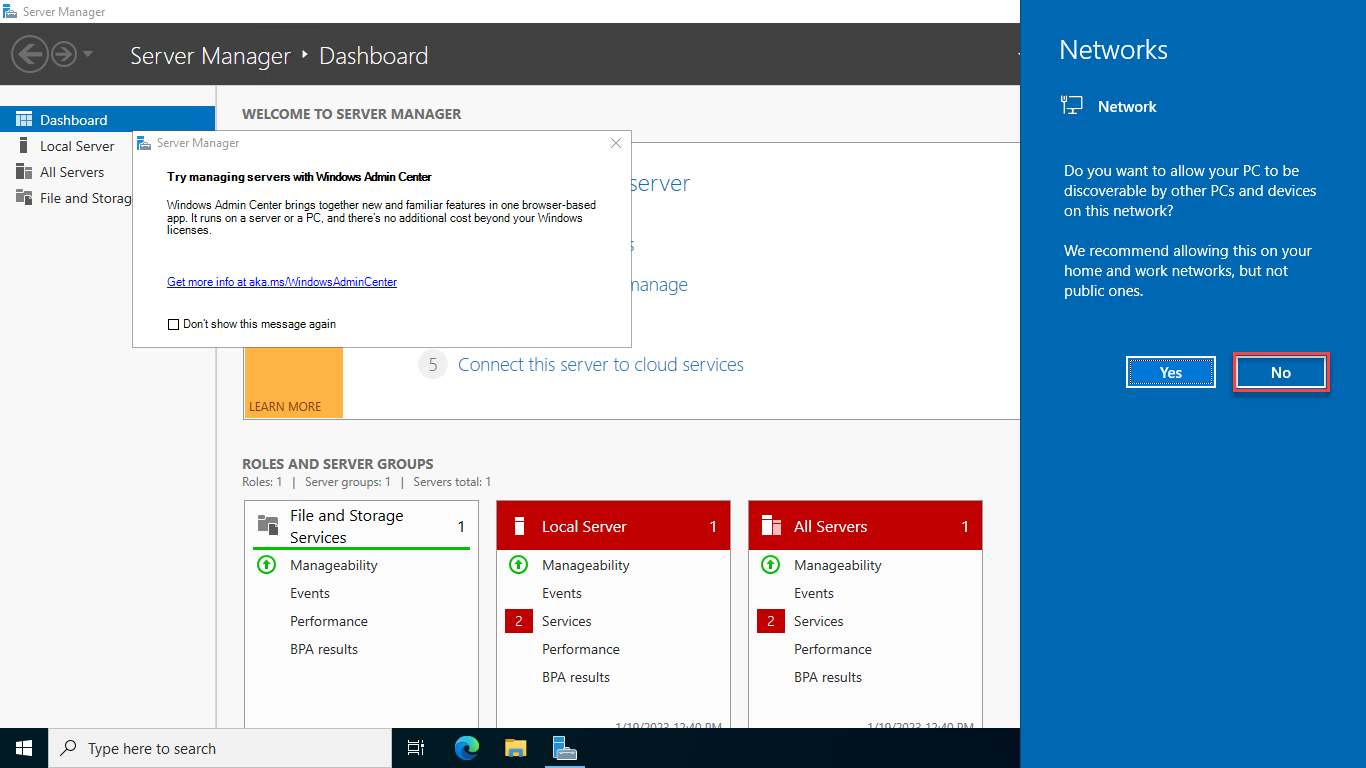
- Upon logging in, Server Manager will load. On the Server Manager screen, click No on the Networks message.
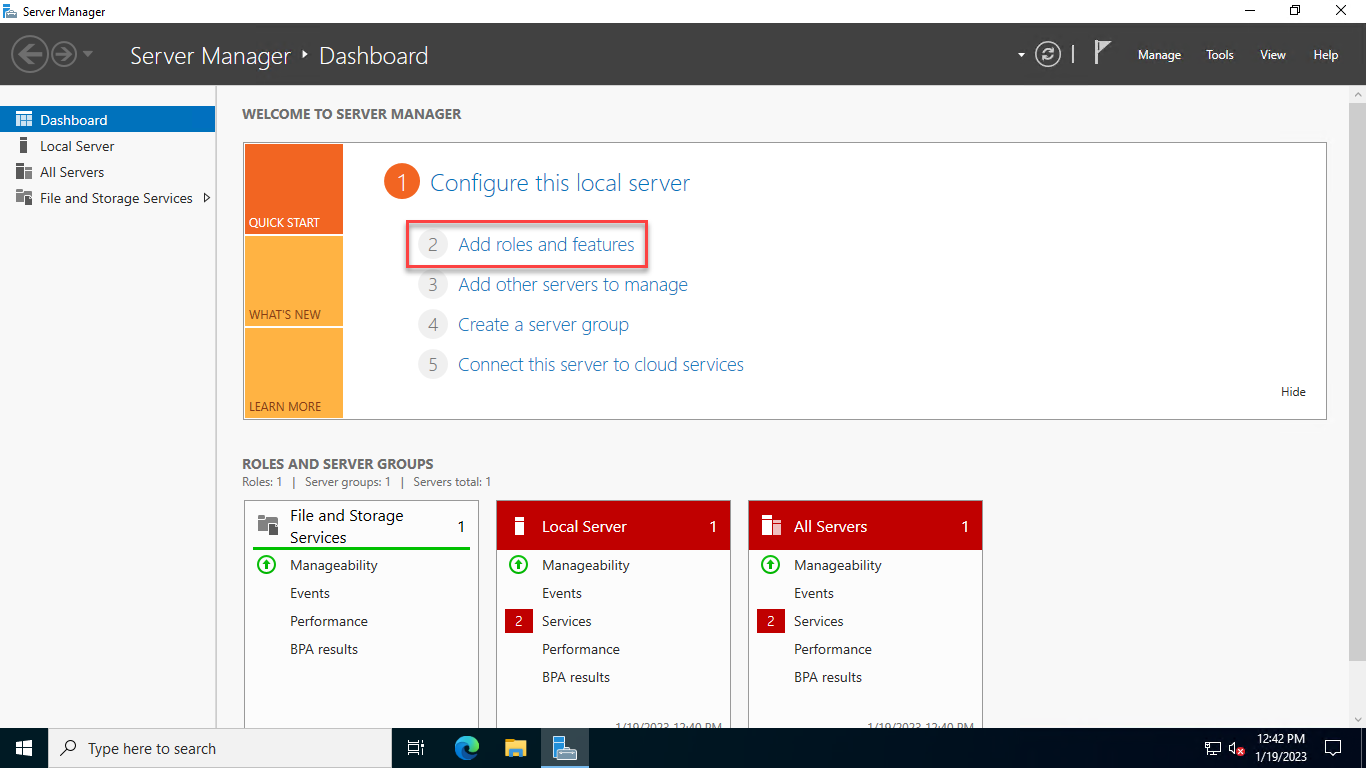
- On the Server Manager Dashboard, click "Add roles and features".
- In the Add Roles and Features Wizard, check "Skip this page by default" and click Next.
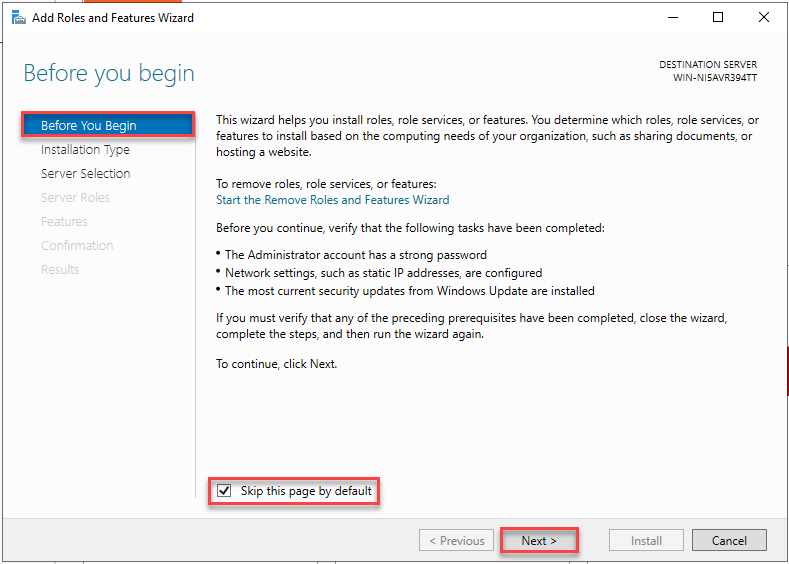
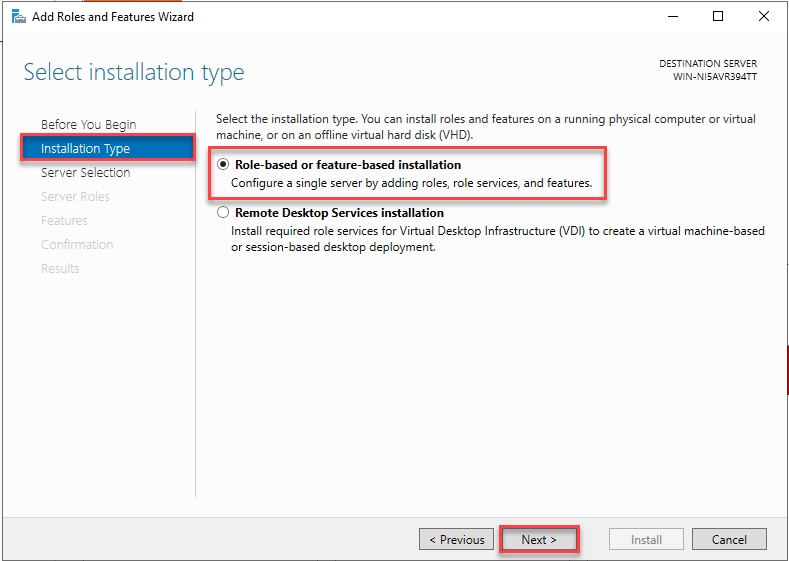
- Installation Type: Select "Role-based or feature-based installation". Click Next.
- Server Selection: Select "Select a server from the server pool". Confirm that it is your server in the Server Pool. Click Next.
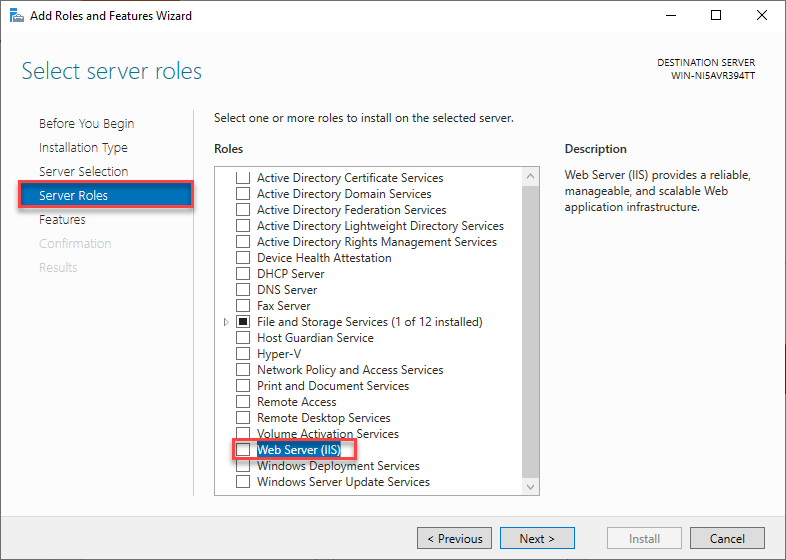
- Server Roles: Check "Web Server (IIS)".
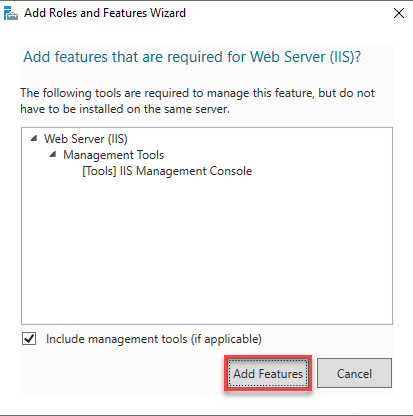
- Click Add Features
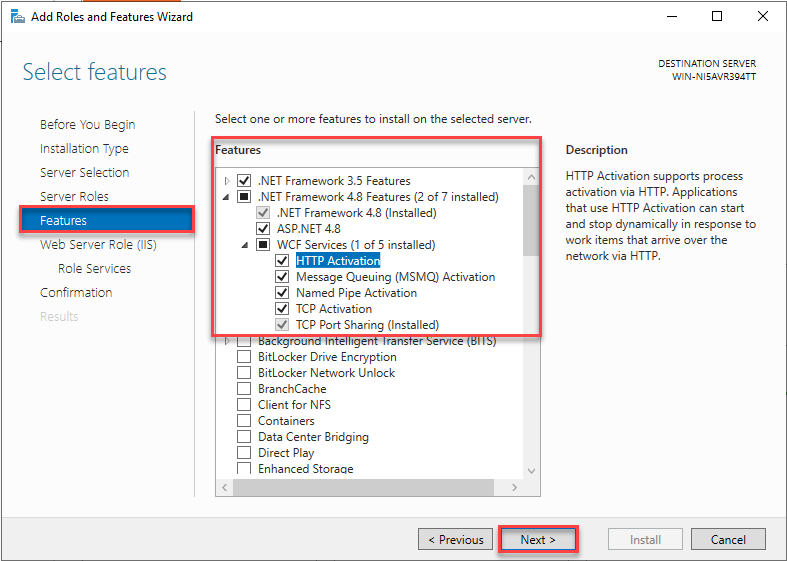
- Check .NET Framework 3.5 Features. Check .NET Framework 4.8 Features and everything under .NET Framework 4.8 Features. Click Next.
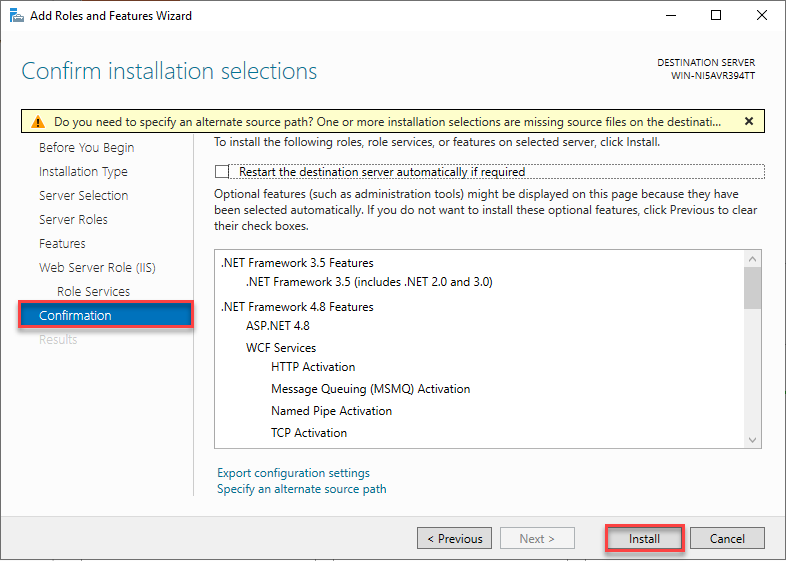
- Confirmation: Confirm the roles, role services or features you are installing. Click Install.
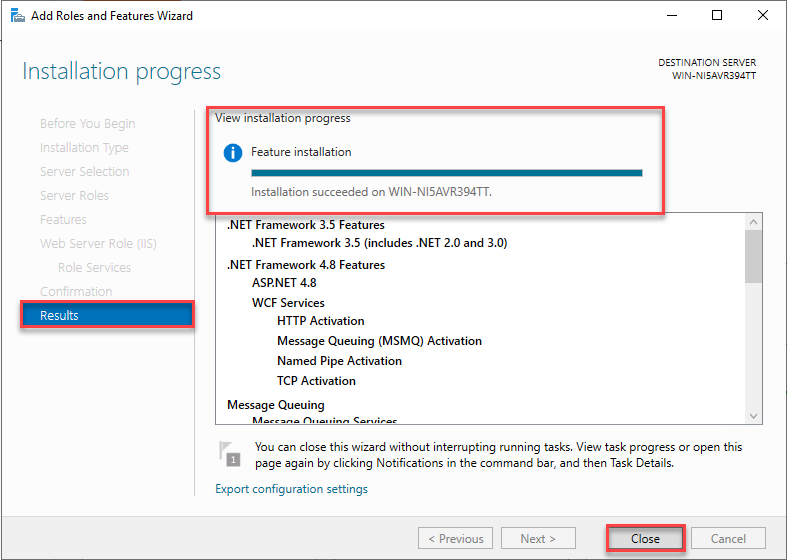
- Results: Installation Successful. Click Close.
Install SQL Server 2014
- To perform this and future
- In your Virtual Machine, navigate to: Media > DVD Drive > Insert Disk...
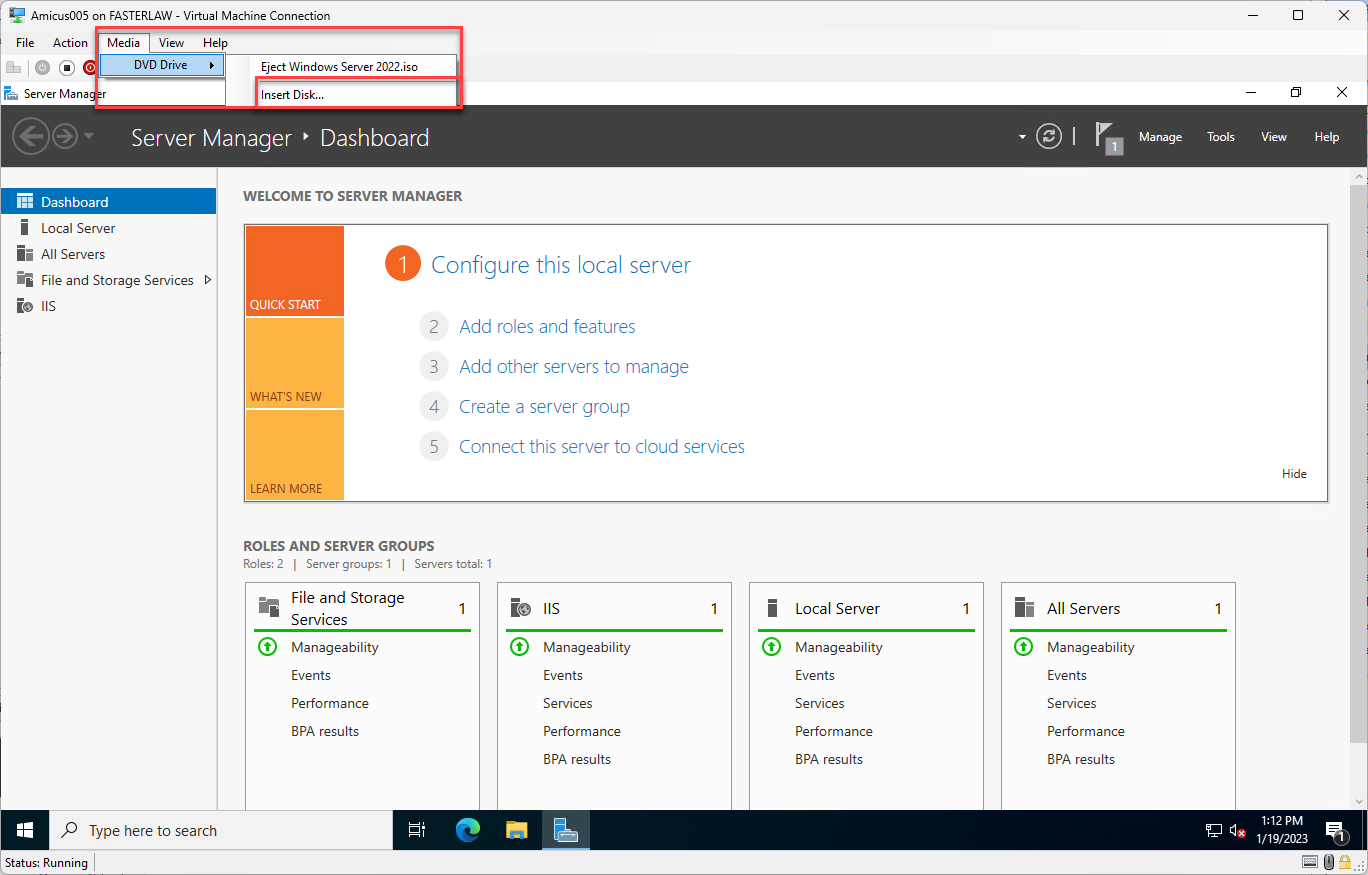
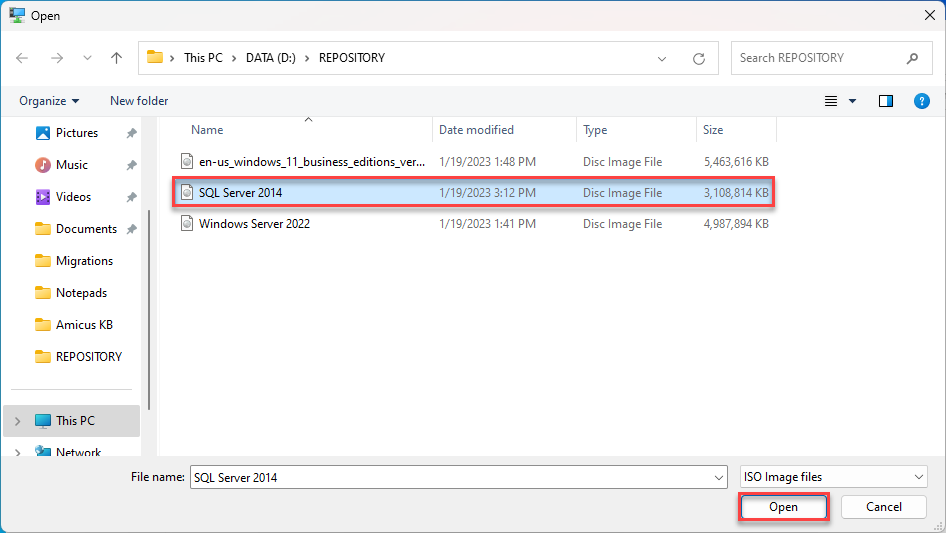
- Select your SQL Server 2014.iso file. Click Open.
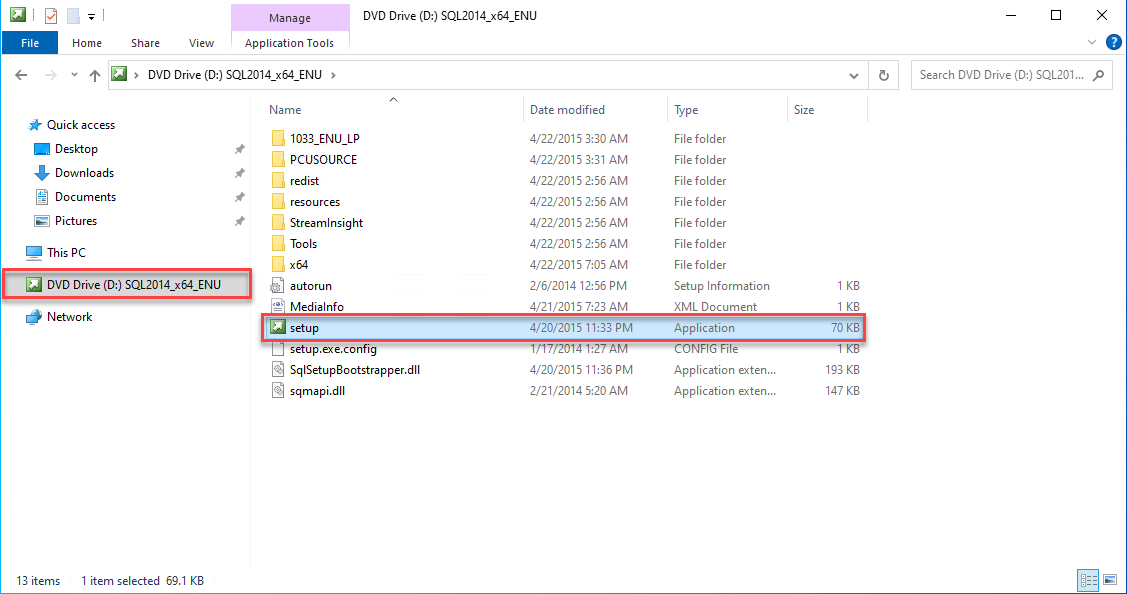
- Navigate to your Virtual Machine's DVD Drive and run the "setup" Application.
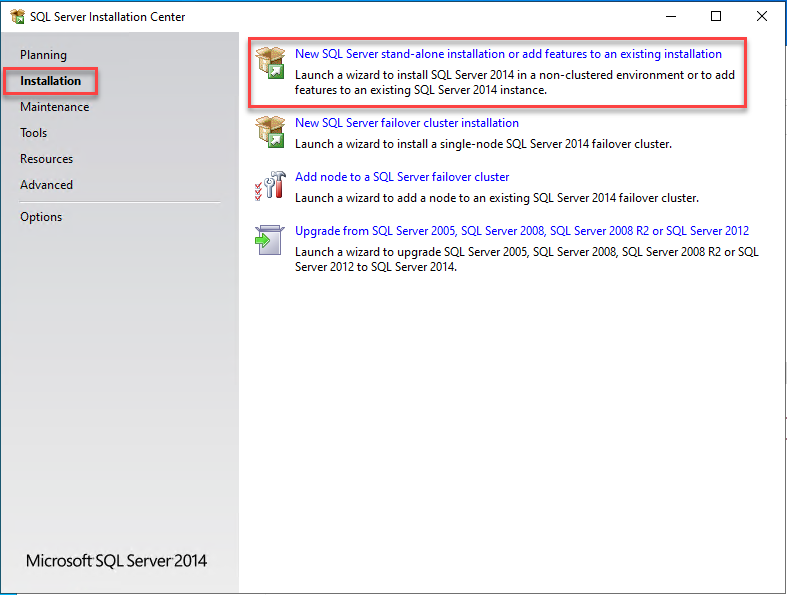
- In the SQL Server Installation Center, navigate to Installation and select "New SQL Server stand-alone installation or add features to an existing installation".
SQL Server 2014 Setup
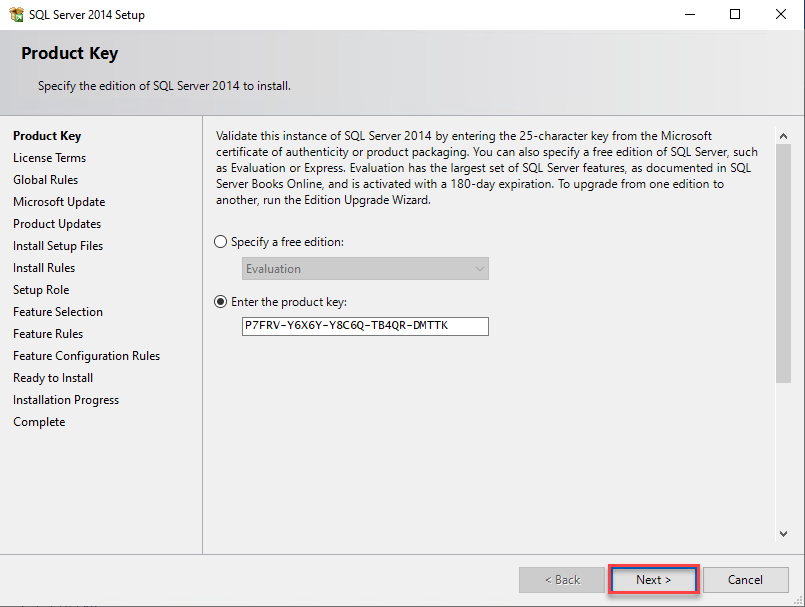
- Product Key: Confirm Product Key. Click Next.
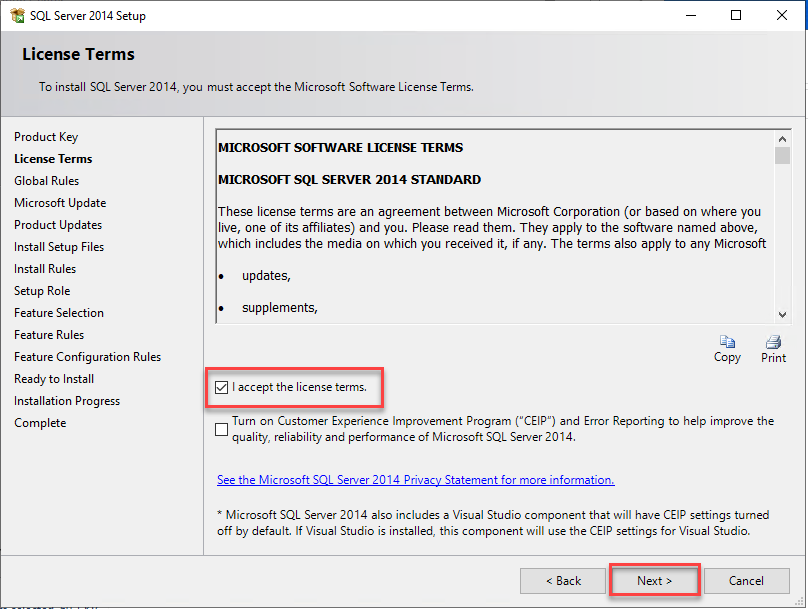
- License Terms: Accept license terms. Click Next until you get to Install Rules.
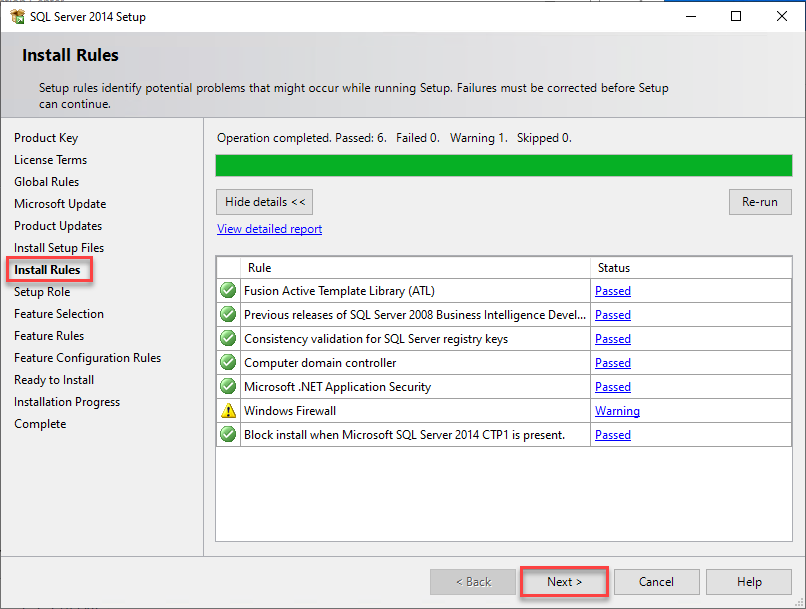
- Install Rules. Confirm the operation has completed. Click Next.
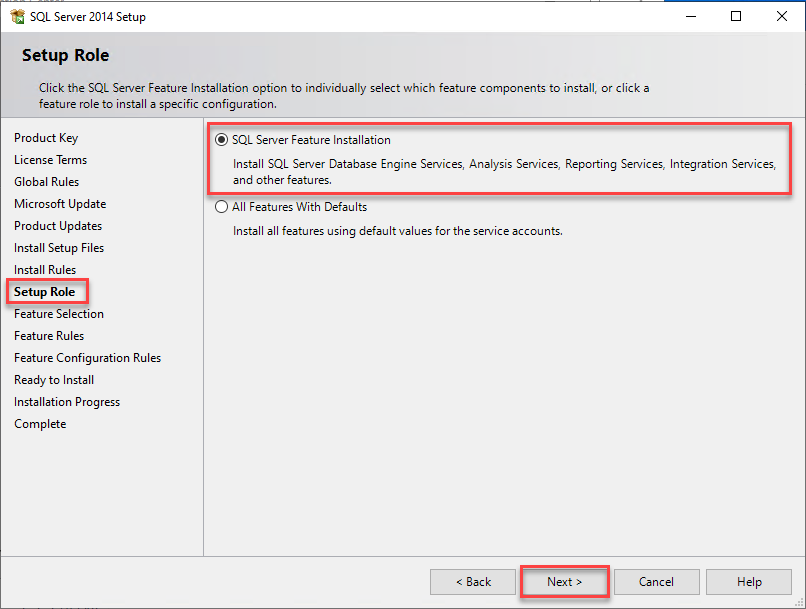
- Setup Role: Select "SQL Server Feature Installation". Click Next.
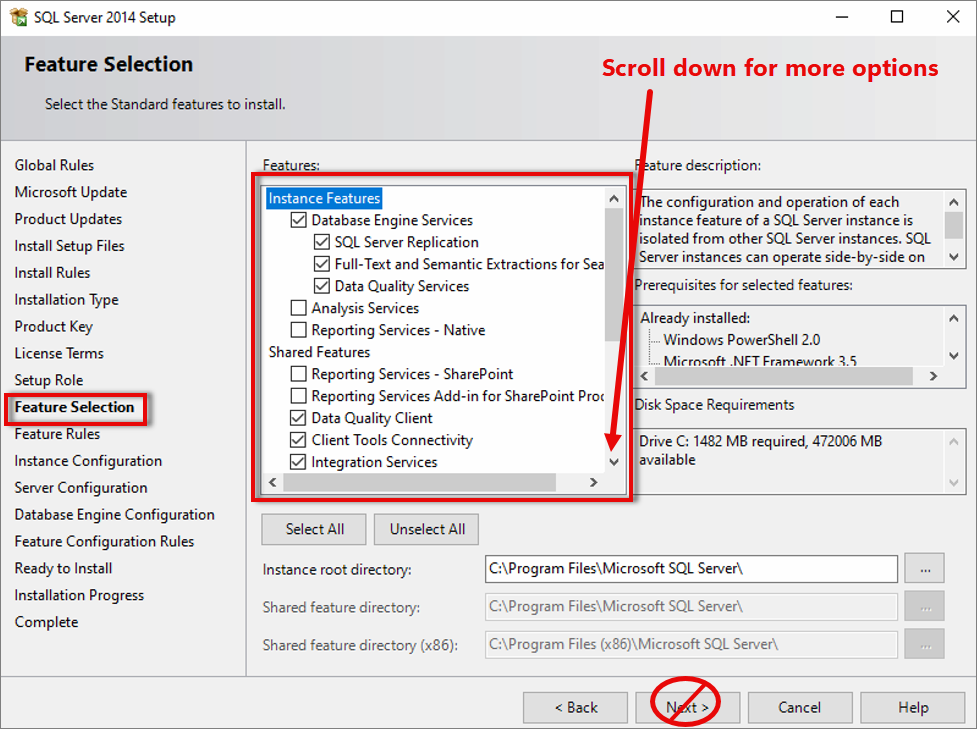
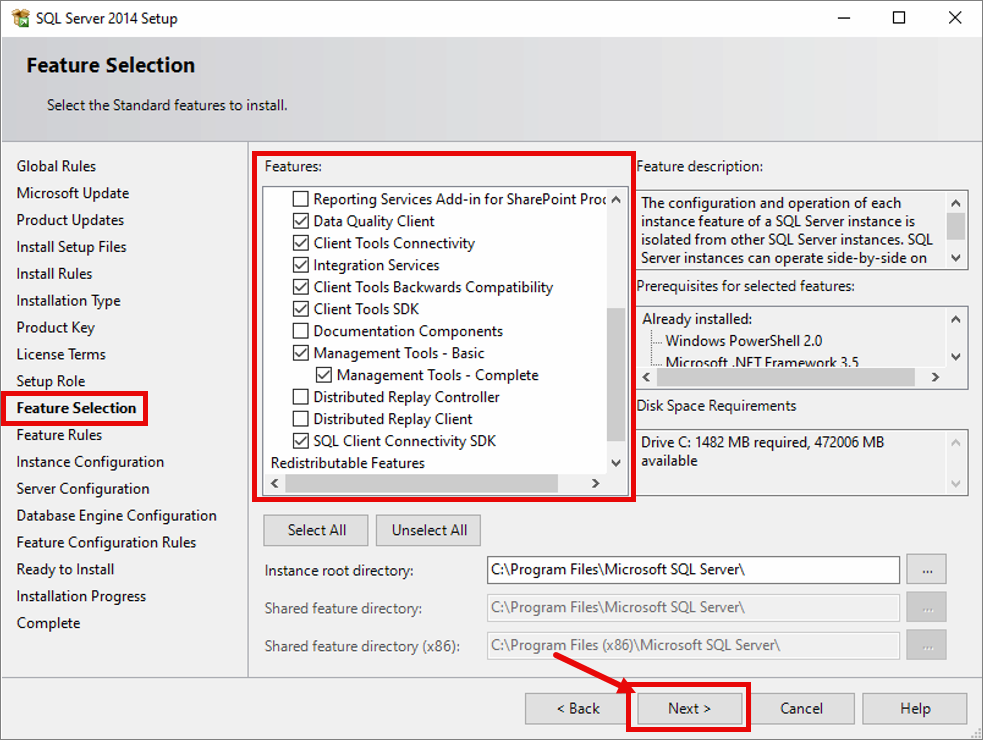
- Feature Selection: Select all features EXCEPT:
- Analysis Services
- Reporting Services - Native
- Reporting Services - SharePoint
- Reporting Services Add-in for SharePoint Products
- Documentation Components
- Distributed Replay Controller
- Distributed Replay Client
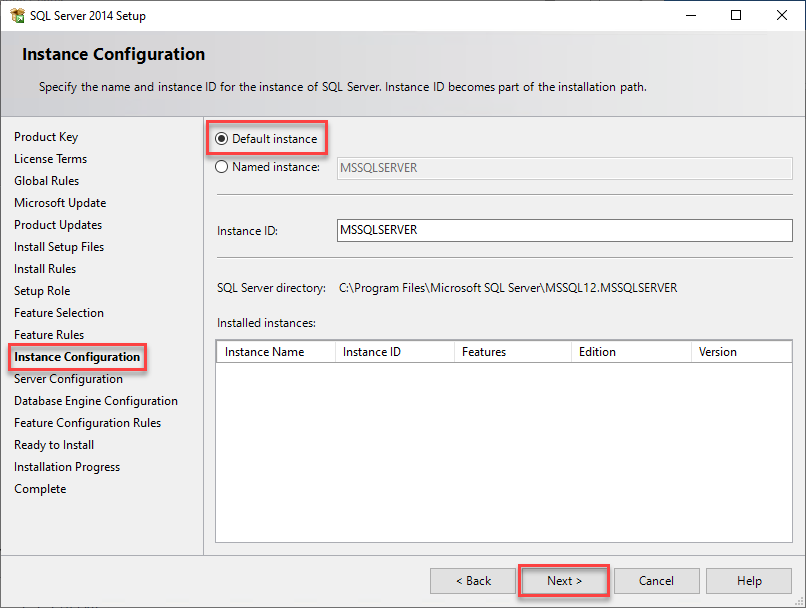
- Instance Configuration: Select Default instance. Click Next.
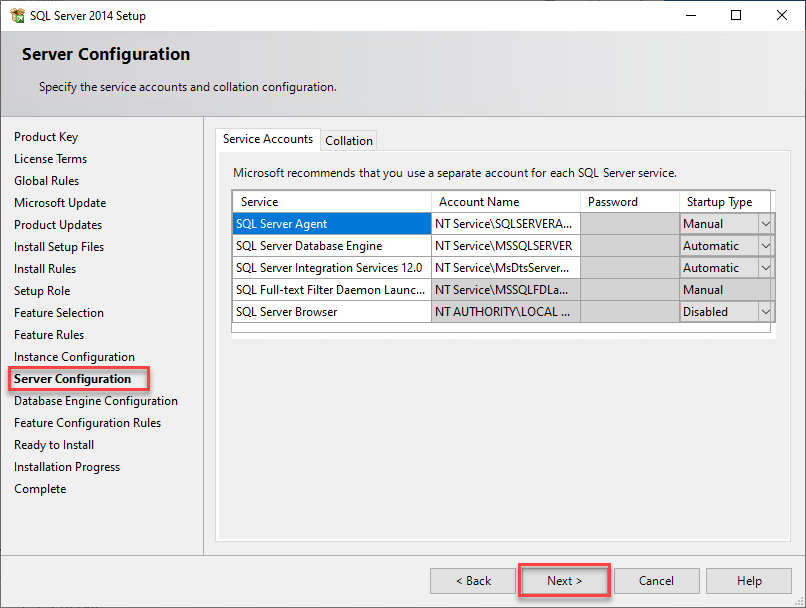
- Server Configuration: Click Next.
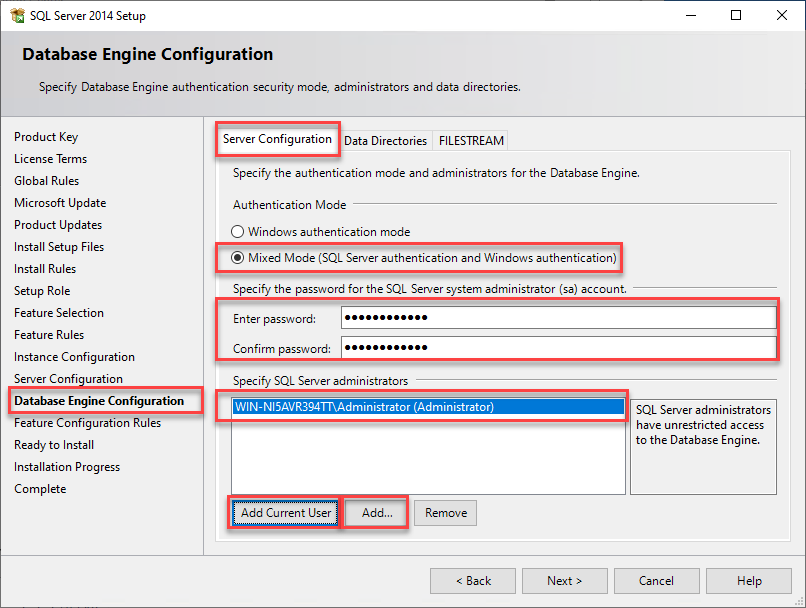
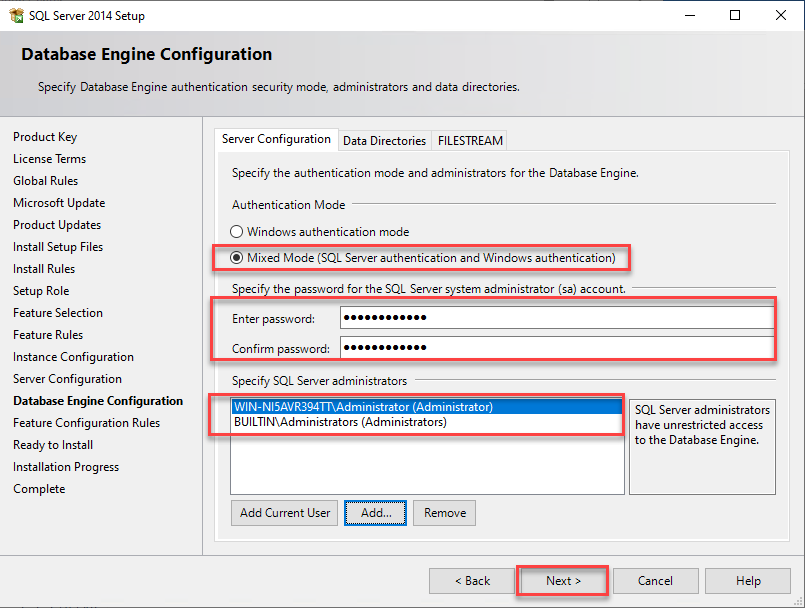
- Database Engine Configuration: In Server Configuration tab, select Mixed Mode. Enter a password for your SQL Server system administrator account. Click "Add Current User" and wait for your user to show up in the administrators box. Once your user appears in the administrators box, Click "Add...".
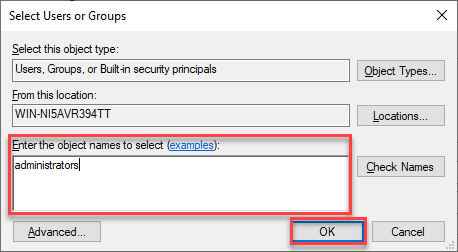
- In the "Select Users or Groups" screen, type "administrators" in the names box. Click OK.
- Database Engine Configuration: Confirm your screen looks like the below image. Click Next.
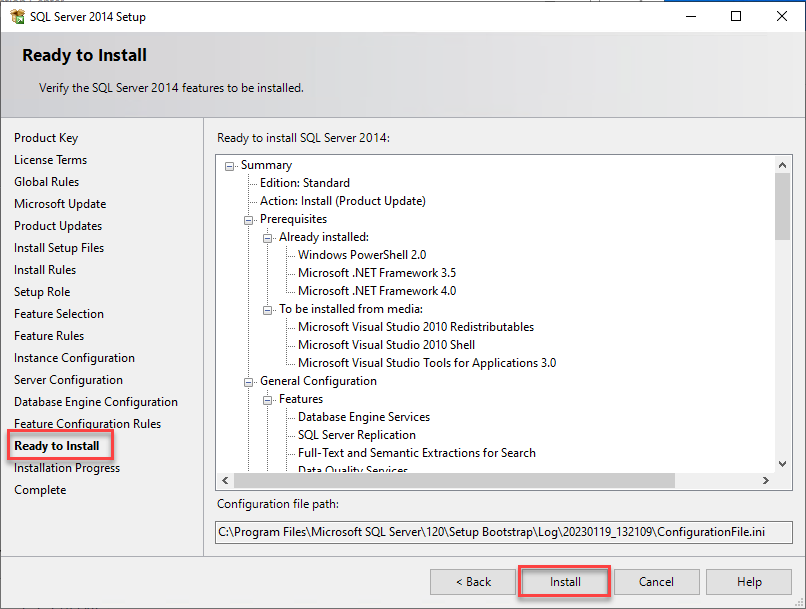
- Ready to install: Confirm your choices. Click Install.
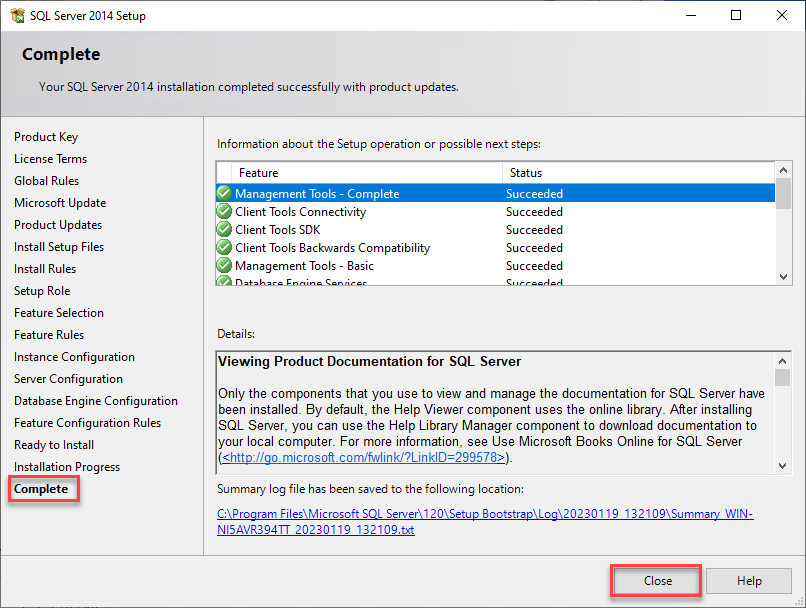
- Install Complete: After a few minutes, your SQL Server 2014 Install is complete. Click Close.
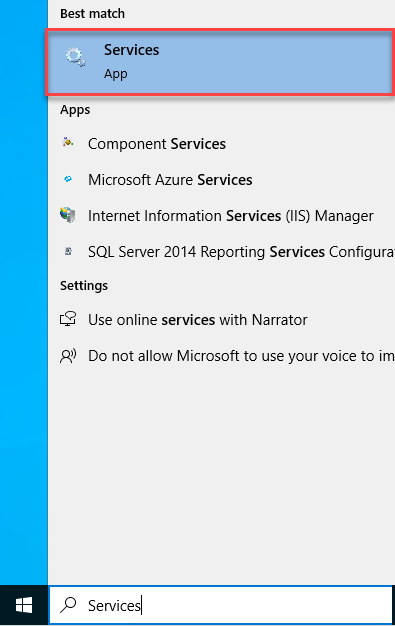
- In your virtual machine settings, navigate to "Services"
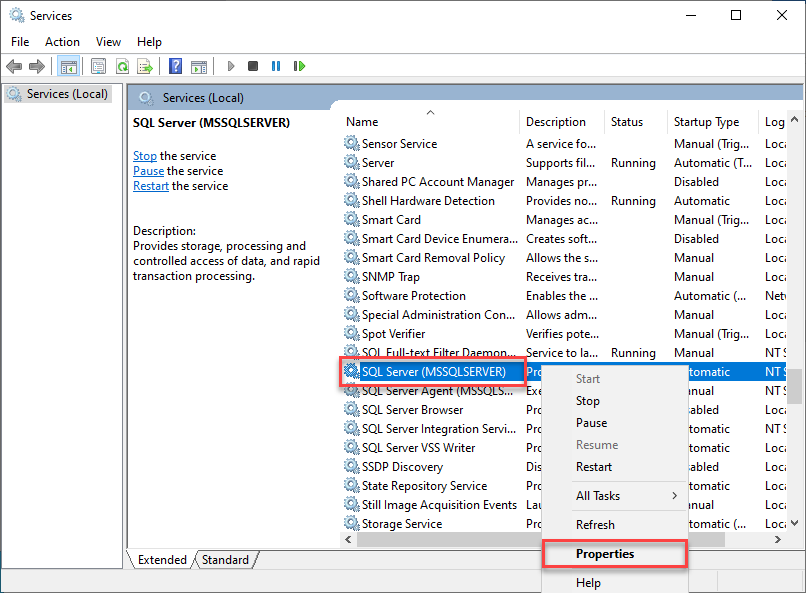
- In your list of Services, find "SQL Server (MSSQLSERVER)". Right Click > Properties.
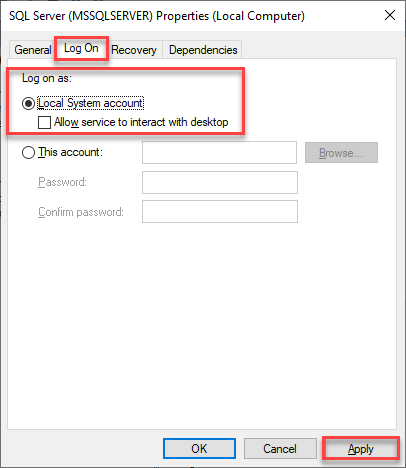
- In the "Log On" tab, select "Local System account". Click Apply.
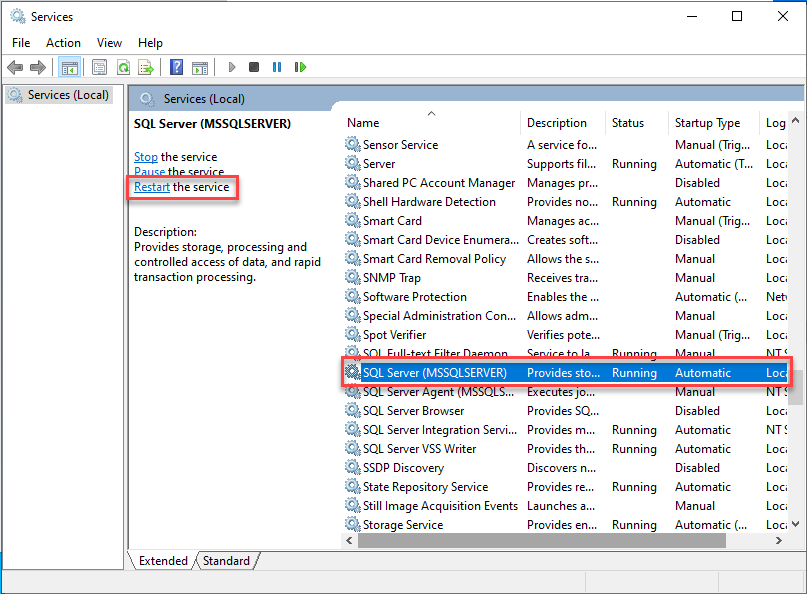
- Restart the service. Select "SQL Server (MSSQLSERVER)" and click Restart.
Install SQL Server 2005 Compatibility Features
- Copy the SQL Server 2005 Compatibility Features.zip file from your local computer, to your virtual machine.
- Navigate to your compatibility features installer package and run the "SQLServer2005_BC_x64" installer. Make sure you select the 64bit version.
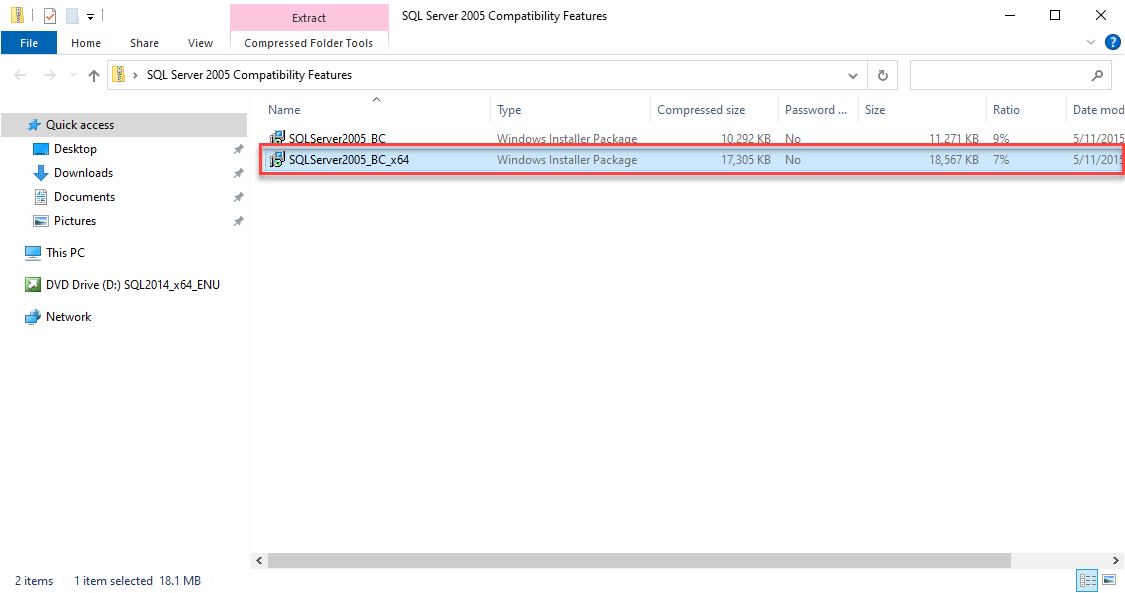
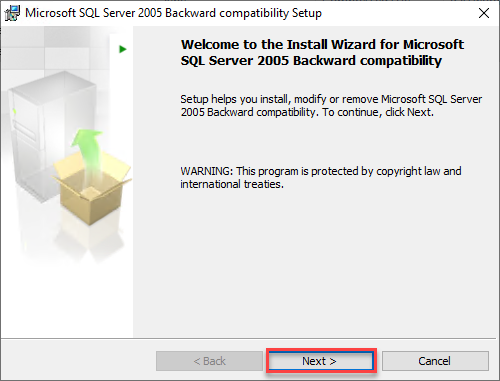
- Install Wizard: Click Next.
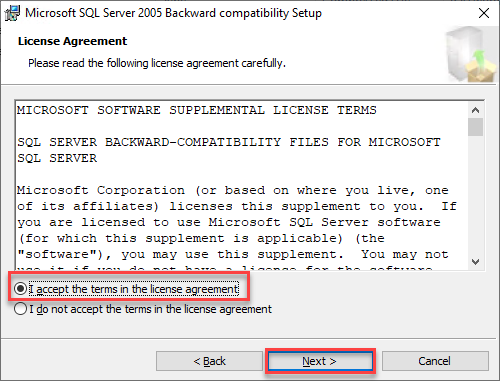
- License Agreement: Accept the terms in the license agreement. Click Next.
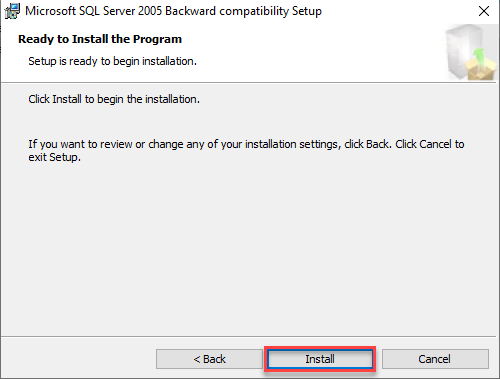
- Ready to Install: Click Install.
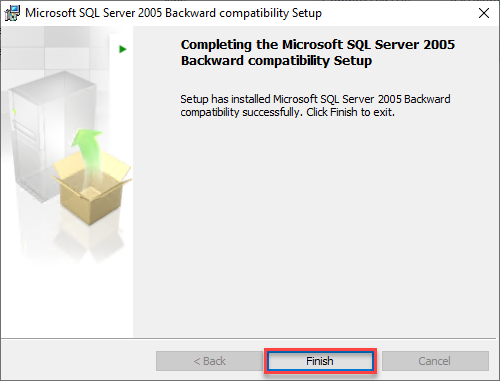
- Installation Complete: Click Finish.
Install SQL Server Management Studio (SSMS)
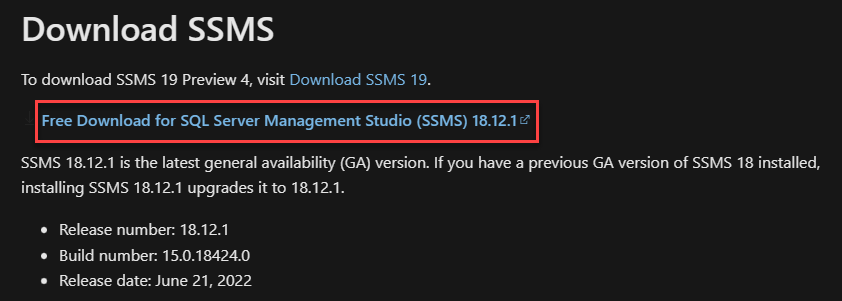
- Click here to download and Install SSMS from Microsoft to your Virtual Machine.
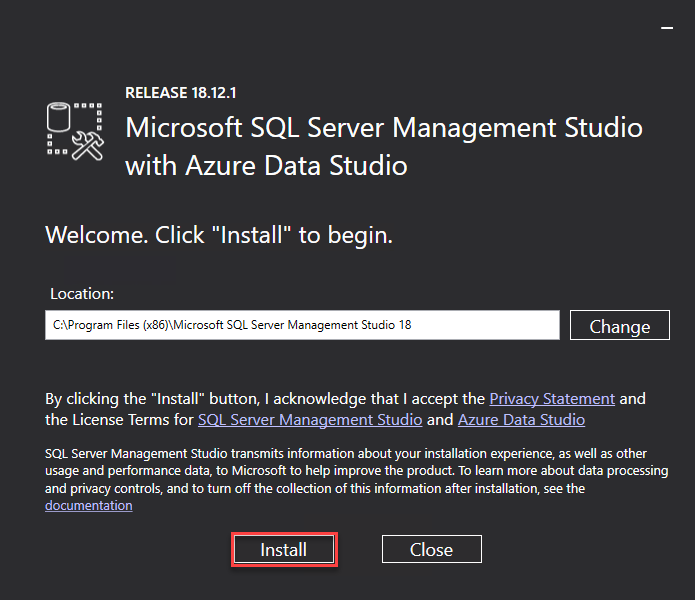
- Run the SSMS .exe File. Click Install.
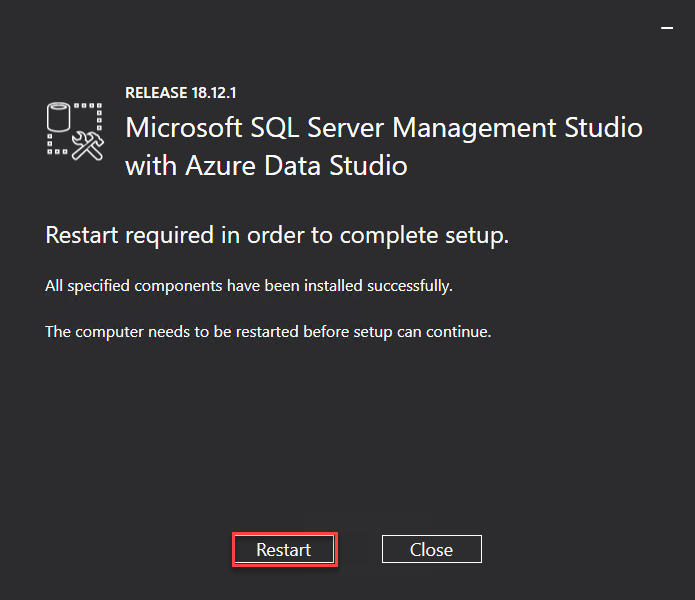
- Restart Virtual Machine. The SSMS Install will require your virtual machine to restart in order to complete setup. Click Restart.
- SSMS Install Complete.
Install Amicus
- Copy the Amicus Installer.zip file from your local computer, to your virtual machine.
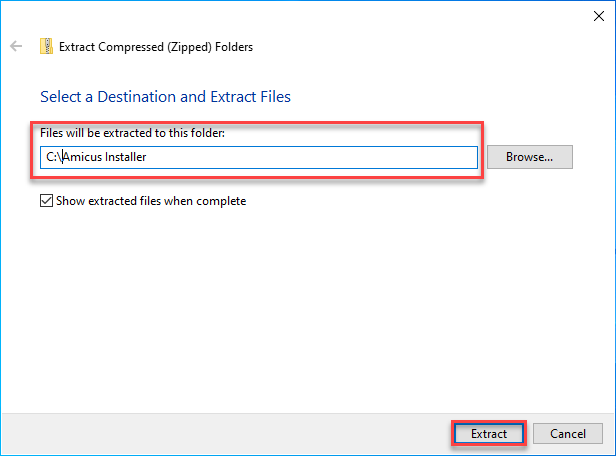
- Extract Amicus Installer: In your virtual machine, extract Amicus Installer to your Virtual Machine's C:\. Click Extract.
- Note that in the below image Amicus Installer is extracted directly to the virtual machine's C:\
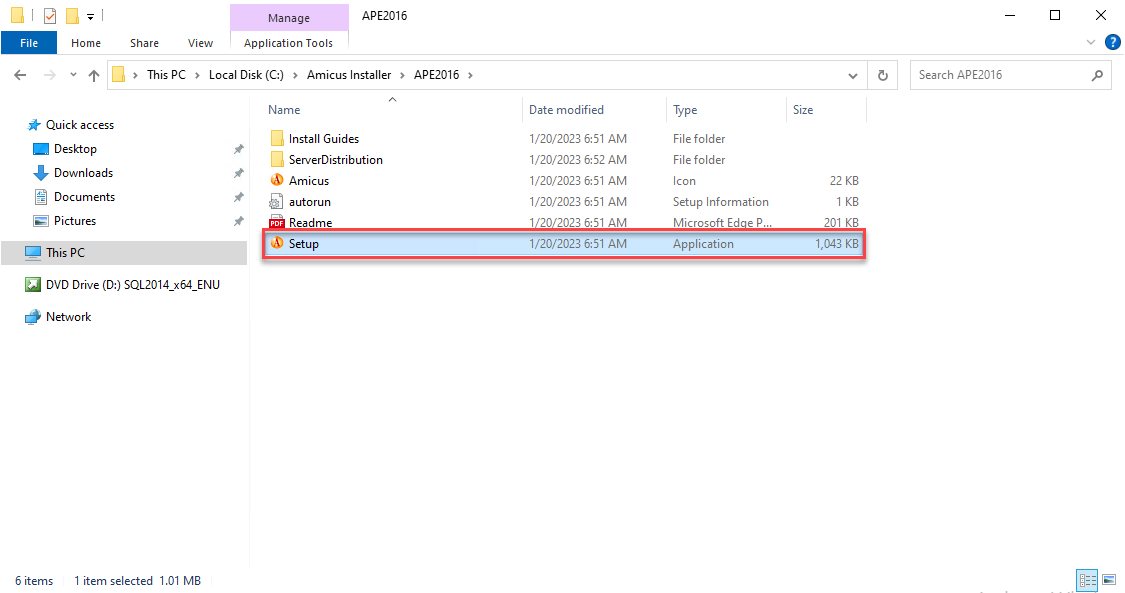
- In your extracted Amicus Installer folder, run the "Setup" Application.
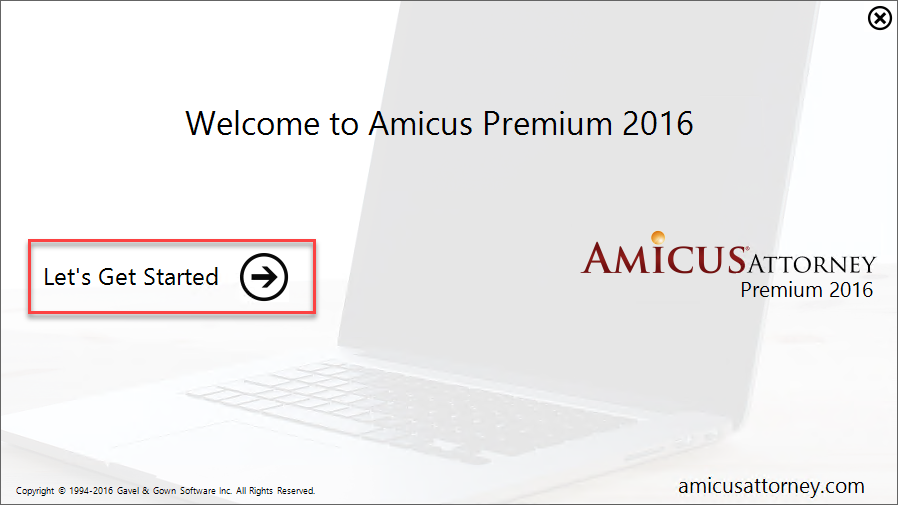
- Start Amicus and Click Next. Click Next until you get to the screen requesting a SQL server name.
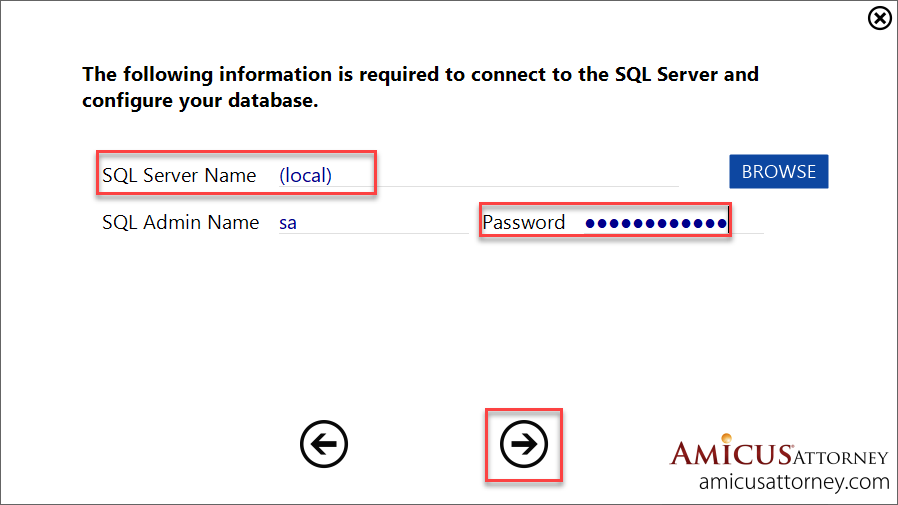
- SQL Server Name and Password: Enter your SQL Server Name: (local) and the same password you set in "Install SQL Server 2014" step 8. Click Next.
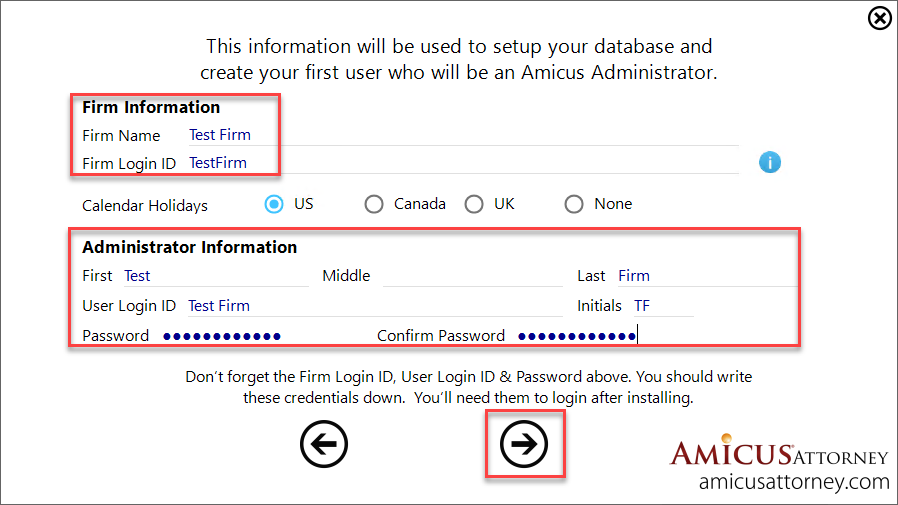
- Enter the firm information and administrator information. Click Next.
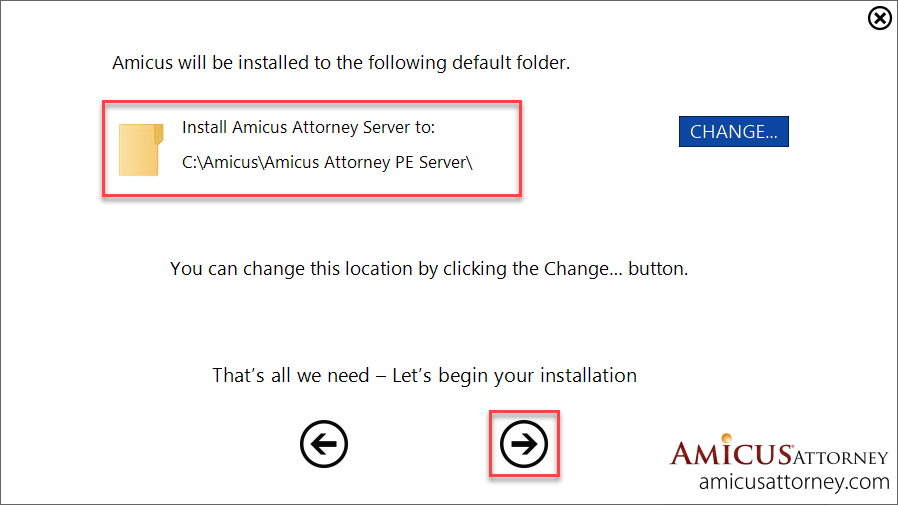
- Confirm Installation. Click Next.
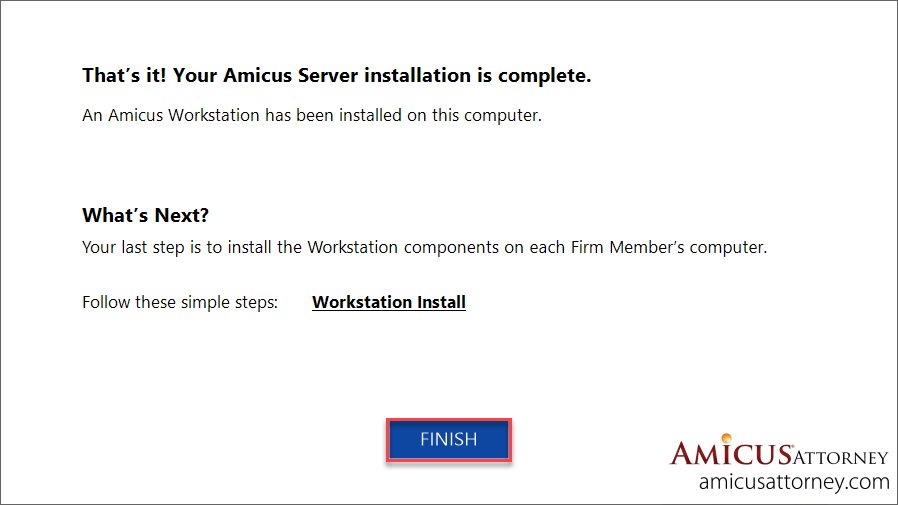
- Installation complete. Click Finish.
Modify ODBC Settings
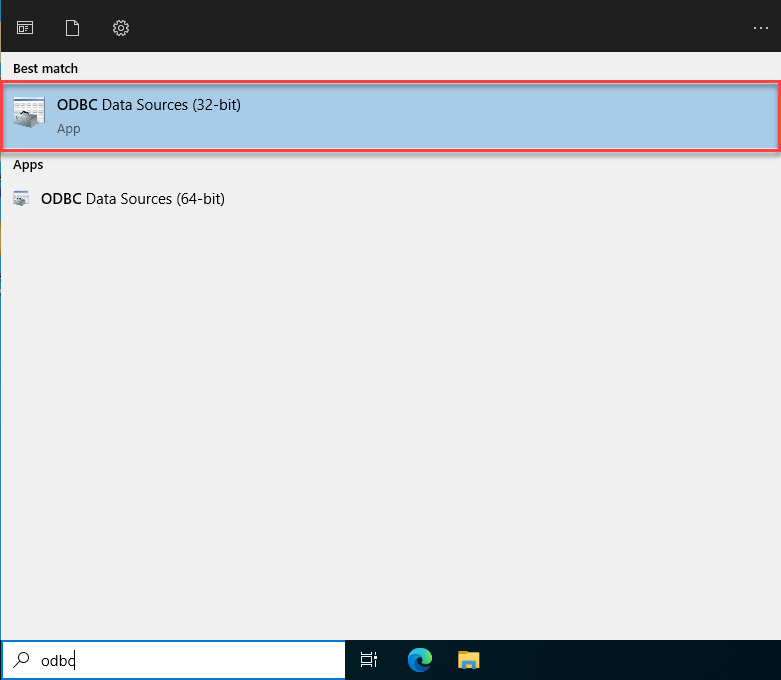
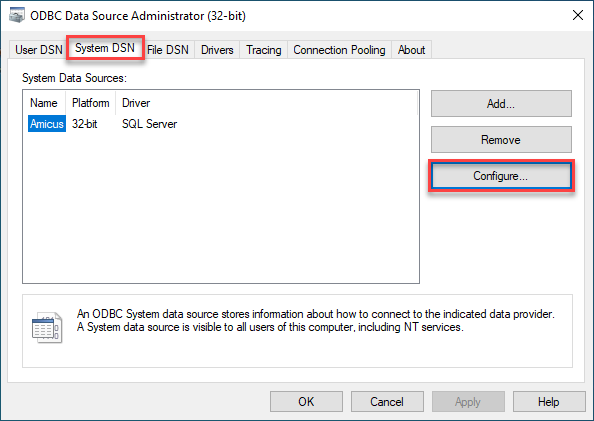
- Search "ODBC" in your Virtual Machine Settings. Select "ODBC Data Sources (32-bit)".
- Navigate to the "System DSN" tab. Click "Configure..."
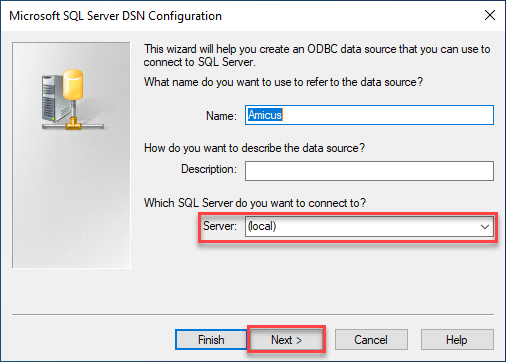
- Type "(local)" into the server text field. Click Next.
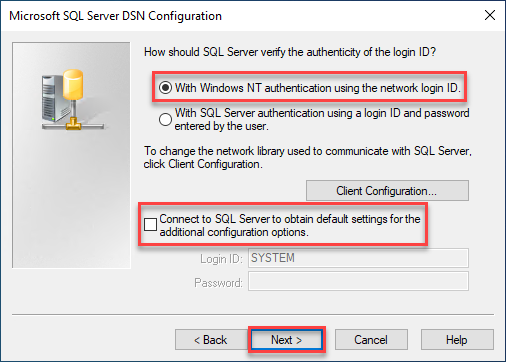
- Select "With Windows NT Authentication using the network login ID. Uncheck "Connect to SQL Server to obtain default settings for the additional configuration options". Click Next.
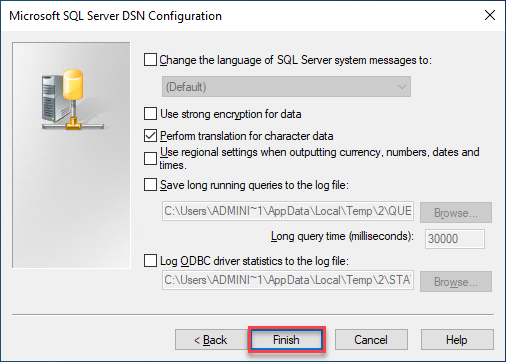
- Finish DSN Configuration: Click Finish.
- ODBC Microsoft SQL Server Setup: Click "Test Data Source..."
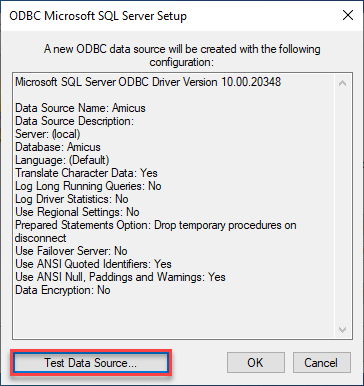
- Test Successful: Verify that your test is successfull. Click OK.

- Modify ODBC Settings Complete. Close out of ODBC Settings. You are now ready to convert a firm's data.
Convert a Firm's Data
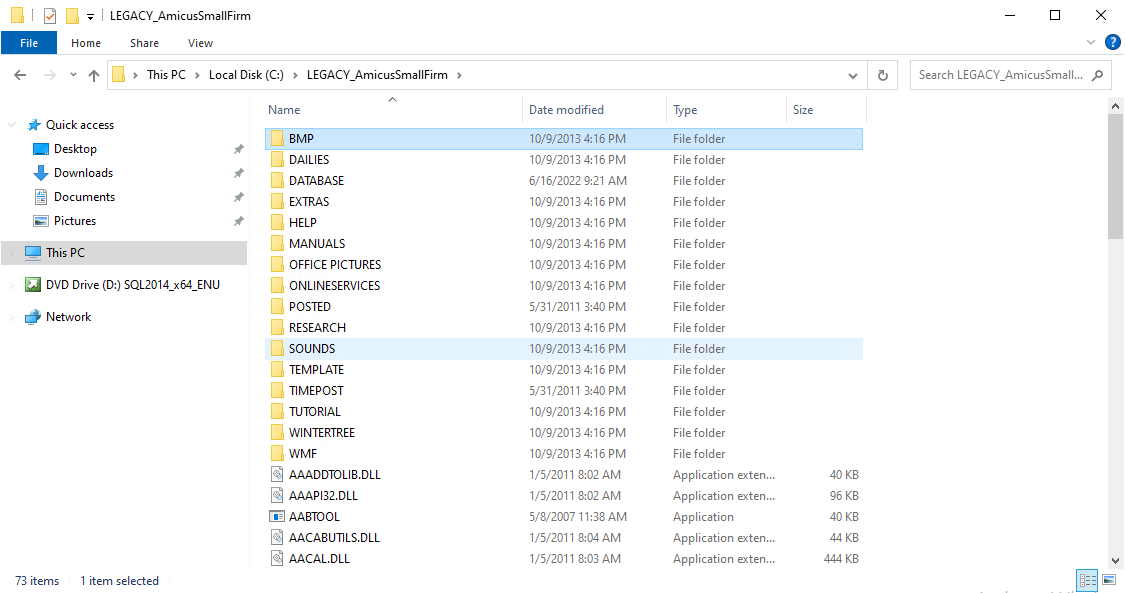
- To convert a firm's data, you will need a copy of the firm's Amicus Small Firm Edition Install Folder. Not just the database. The entire install folder from Amicus. This folder must be copied into the virtual machine. The folder should look similar to the image below:
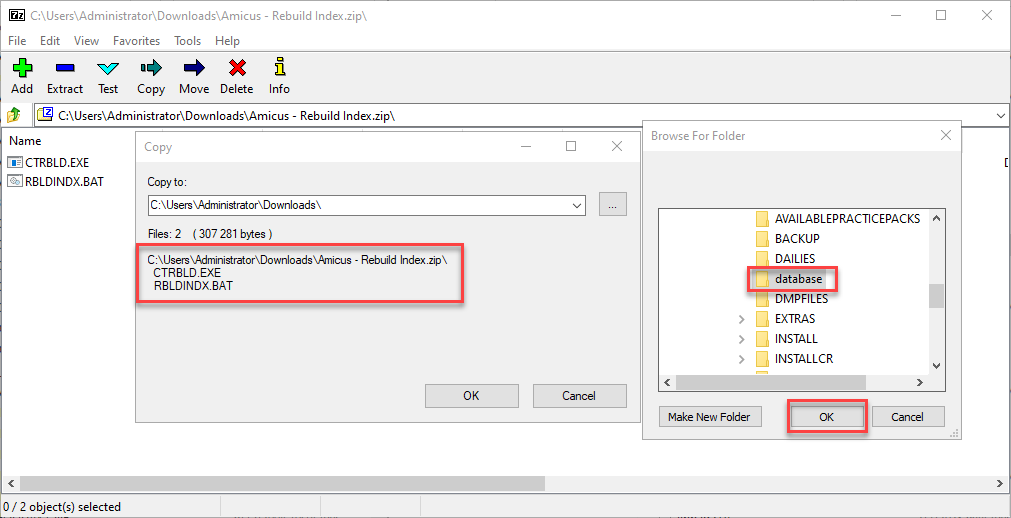
- Copy the Amicus - Rebuild Index.zip from your local computer to your virtual machine.
- Extract the Amicus - Rebuild Index.zip to the "database" folder in your Amicus Small Firm Database.
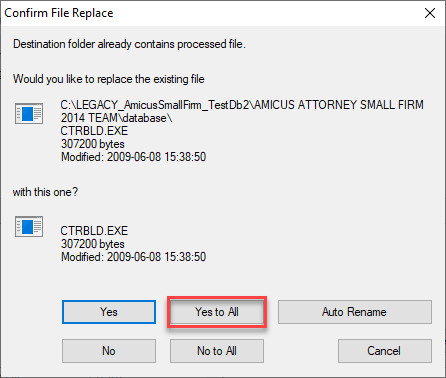
- If prompted, replace all files in destination. Click "Yes to All".
- In the "database" folder, Run "RBLDINDX".
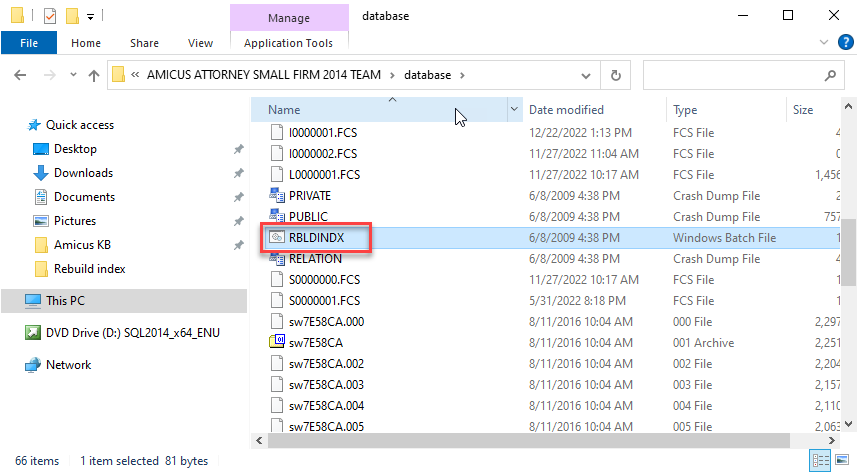
- Running the RBLDINDX window will look like the below image. Let the RBLDINDX window complete.

- Rebuild Complete. Press any key to continue.

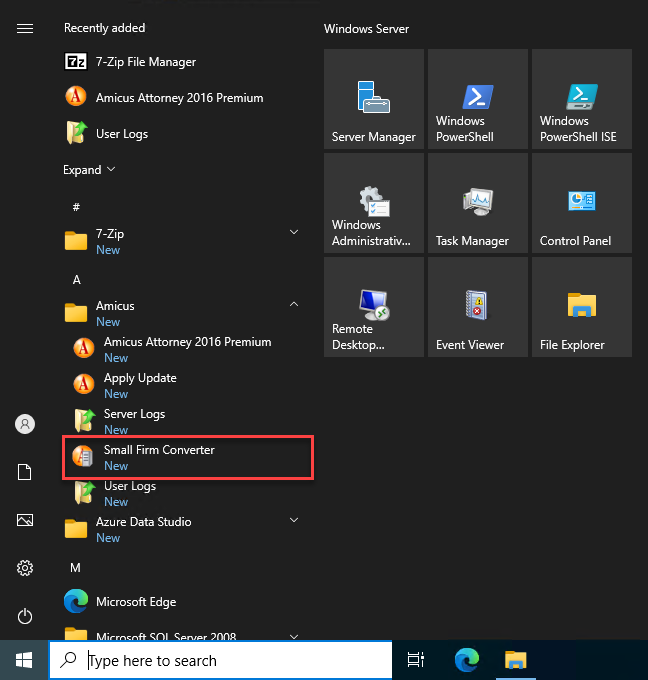
- In your virtual machine, find and run Amicus Small Firm Converter.
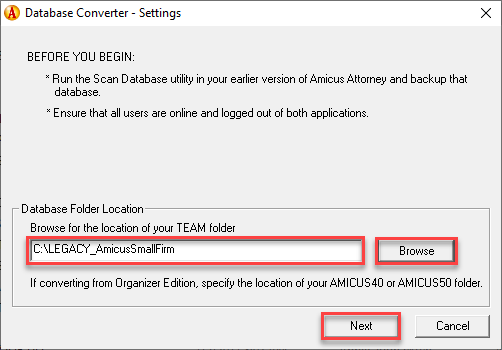
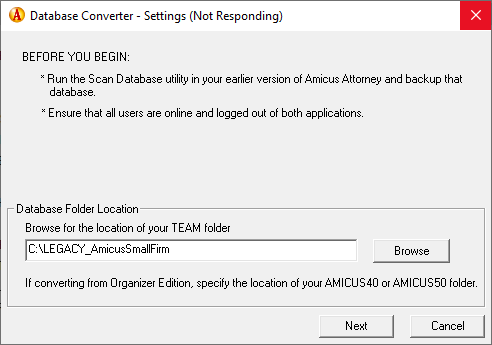
- Database Converter - Settings: Click Browse. Select the location on your VM where you copied the firm's Amicus Small Firm Installer Folder. Click Next.
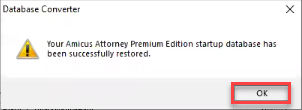
- Throughout this process the application will appear to freeze and you will get a (Not Responding) message, this is expected. This process will be slow. You will get a "Successfully restored" message. Click OK.
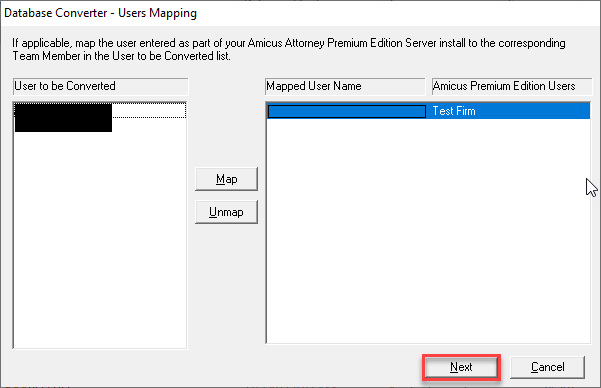
- Database Converter - Users Mapping: Nothing needs to be done on this screen. Click Next.
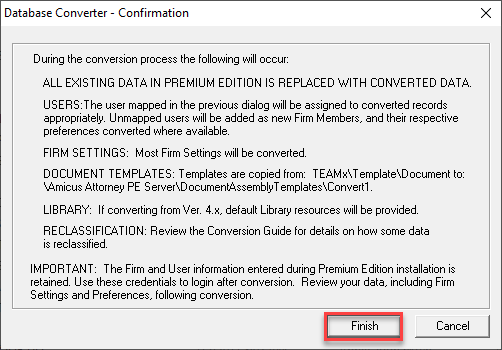
- Database Converter - Confirmation: Click Finish.
- Your Conversion will start. This process will be slow and the screen will occasionally say (Not Responding), that is expected.
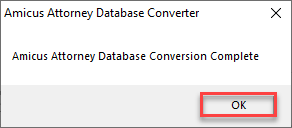
- Conversion Complete: This process will complete and you will arrive at a "conversion complete" message. Click OK.
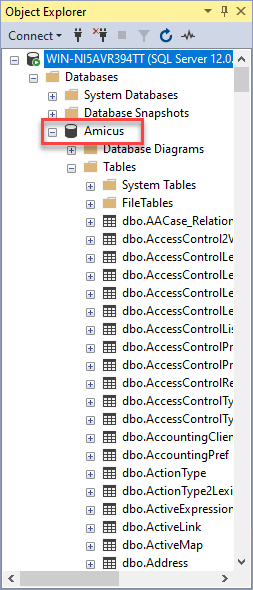
- Open SSMS in your virtual machine.

- You will now have an Amicus Database that you can use with Universal Migrator.
Related Articles
Amicus Accounting: Database Conversions
Because Amicus Accounting uses the FoxPro database engine, it must be converted before you can use it. When you receive an Amicus Accounting backup, it will be a ZIP file with content like this: You should extract the ZIP file and then locate the ...
Amicus Cloud Extractions: Read Me First
When backing up data from Amicus Cloud there are a few things you should be aware of. Data is Deduplicated and Merged In the Amicus Cloud database, the contacts are stored multiple times. An algorithm is used to detect duplicate items and merge them ...
Amicus Migrations: Preparing Matters for Export
To prepare your Amicus matters for backup, you should ensure that each matter has an associated "primary client". The following query will indicate what matters in your firm do not have associated clients: SELECT * FROM [File] WHERE 1=1 AND ID != 0 ...
Amicus Migrations: Preparing Users for Export
To prepare your Amicus users for backup, you should ensure that each user has a correctly associated email address. The following query will indicate the email address for each user in your firm. SELECT Name, Initials, DefaultEmail FROM People WHERE ...
Prevail Backups: Database Conversions
Converting the Database Prevail uses an object-oriented database named Postgres. Recover your username and password to Postgres Refer to the Training: POSTGRES - Recovering username/pw article for instructions on preparing your database for ...