How to Create a Rooted Android VM
This article will guide you through creating a rooted Android Virtual Machine (VM) using BlueStacks. Rooting gives you administrative access to the Android operating system, enabling you to modify system files and settings.
Launch BlueStacks on your computer.
1. Click on the Multi-instance Manager (or Instance button) from the main screen.
2. Click Create instance to start the setup for a new virtual machine.

2. Click Create instance to start the setup for a new virtual machine.
The New instance window will open
Select Fresh instance
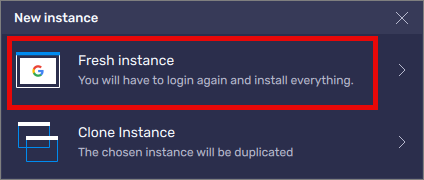
Set the Instance type to Android 11
Confirm the selection and click Next

Select your preferred CPU cores
Select your preferred Memory allocation
Choose a Performance mode
Click Download to get the necessary Android files
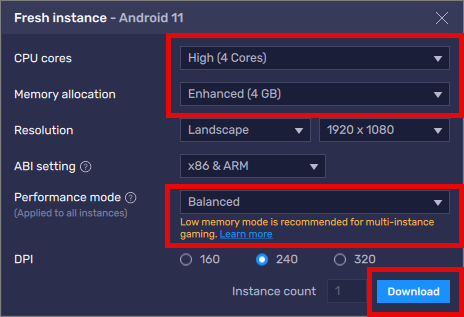
Select Fresh instance
Set the Instance type to Android 11
Confirm the selection and click Next
Select your preferred CPU cores
Select your preferred Memory allocation
Choose a Performance mode
Click Download to get the necessary Android files
Once the download is complete
Click Start to open the new instance
Click Start to open the new instance
Click the gear icon
(Settings) near the bottom-right corner of the Bluestacks VM
Go to the Advanced tab
Toggle ADB (Android Debug Bridge) to On
Click Save changes
Close all BlueStacks windows (Close the VM, the multi-instance manager, and Bluestacks)
Right-click the BlueStacks icon in the system tray and select Exit
Open File Explorer
In the search bar type in %programdata%
Find the folder BlueStacks_nxt
Open it
Locate the file named bluestacks.conf
Open it with a text editor (e.g., Notepad)
Search for
"root" and change it's values from 0 to 1 for all root results which are listed below:bst.feature.rooting="0" tobst.feature.rooting="1"- bst.instance.Pie64.enable_root_access="0" to bst.instance.Pie64.enable_root_access="1"
- bst.instance.Rvc64.enable_root_access="0" to bst.instance.Rvc64.enable_root_access="1"
In the same BlueStacks_nxt directory find the folder Engine
Open it
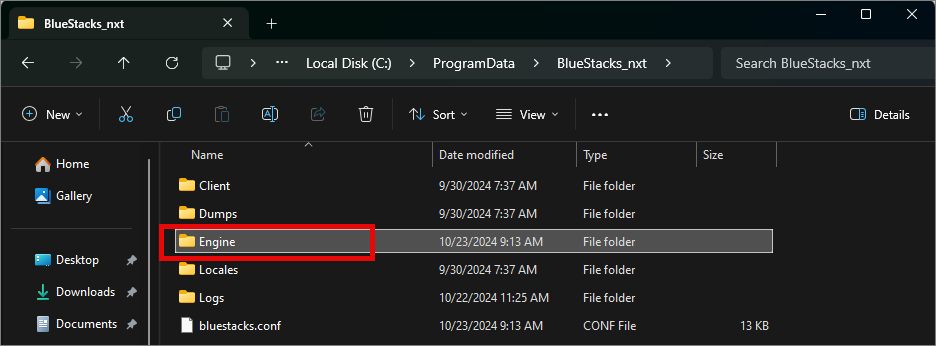
Inside Engine, find the folder Rvc64
Open it
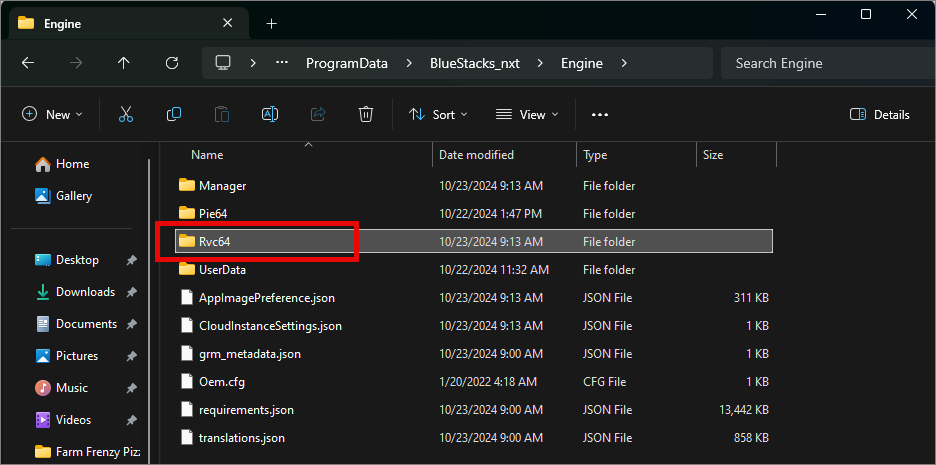
Inside Rvc64 locate the following bstk files
Open it
Inside Rvc64 locate the following bstk files
Android.bstk.in
Rvc64.bstk
Rvc64.bstk-prev
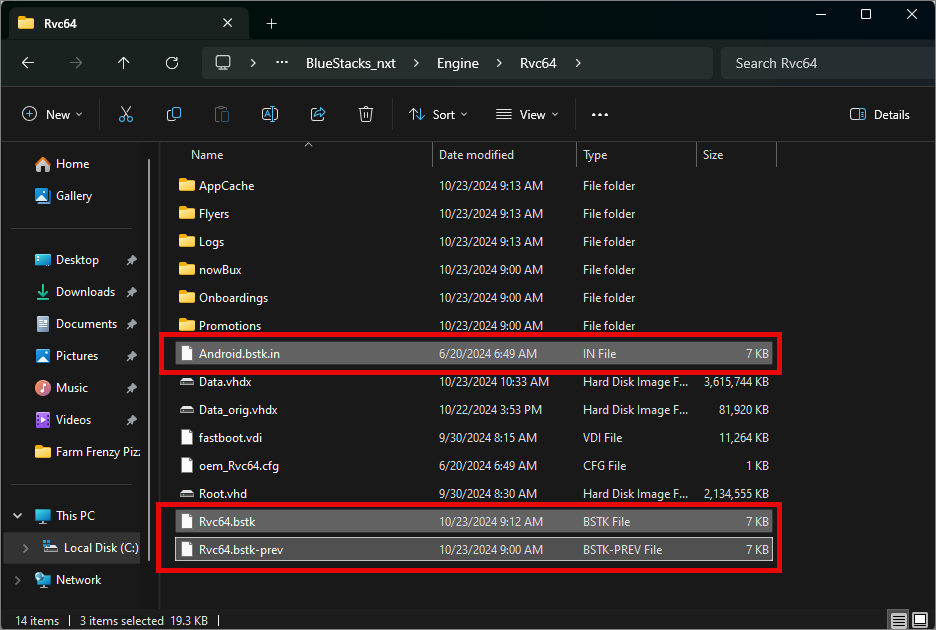
Open each bstk file with a text editor (e.g., Notepad)
In each one, almost at the top, you will find the xml snippet referring to the <HardDisks> section. (Android.bstk.in, Rvc64.bstk, and Rvc64.bstk-prev)
In each one, almost at the top, you will find the xml snippet referring to the <HardDisks> section. (Android.bstk.in, Rvc64.bstk, and Rvc64.bstk-prev)
Once you locate the the <HardDisks> section
Change the "Readonly" values to "Normal" values (on all three bstk files, Android.bstk.in, Rvc64.bstk, and Rvc64.bstk-prev)
Save the changes
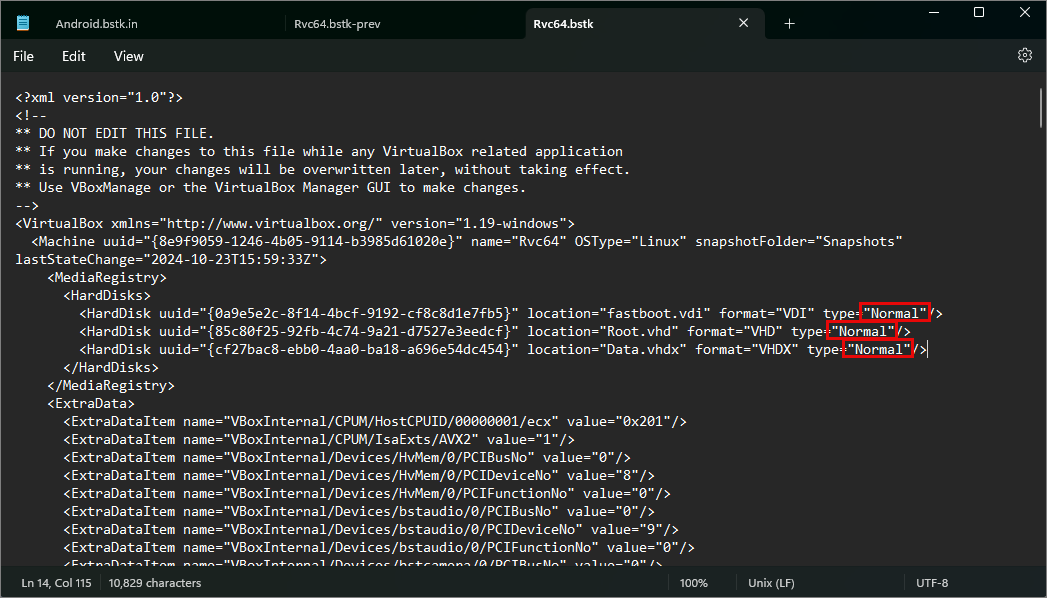
Change the "Readonly" values to "Normal" values (on all three bstk files, Android.bstk.in, Rvc64.bstk, and Rvc64.bstk-prev)
Save the changes
Reopen BlueStacks and start the newly created instance
The VM should now have root access enabled