Setting the Windows Time Zone
Steps to Set the Windows Time Zone
- Open Settings
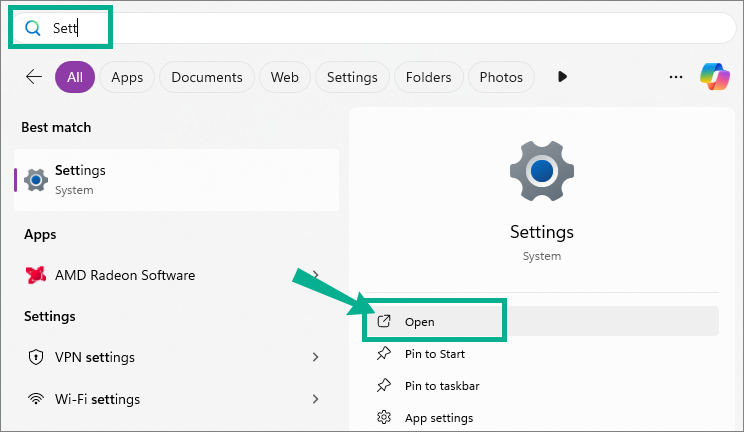
Click the Start button and type Settings
Click Open

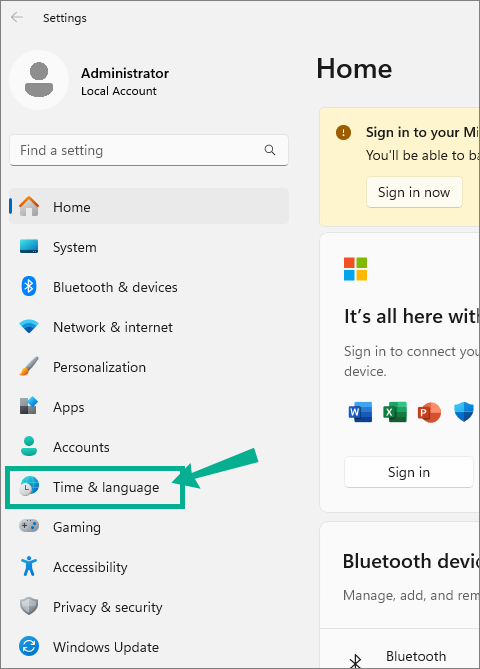
- Go to Time & Language

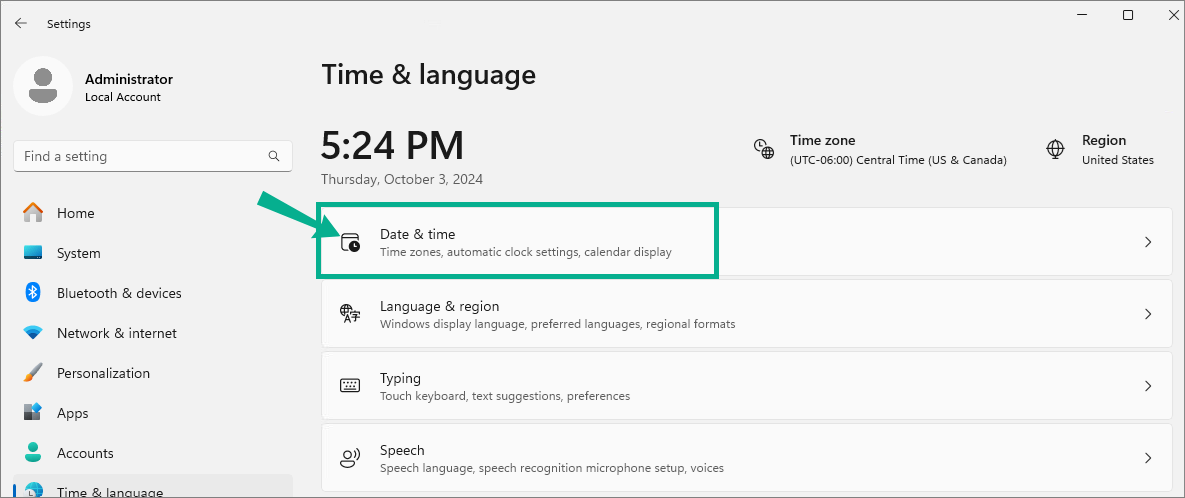
- Select Date & Time

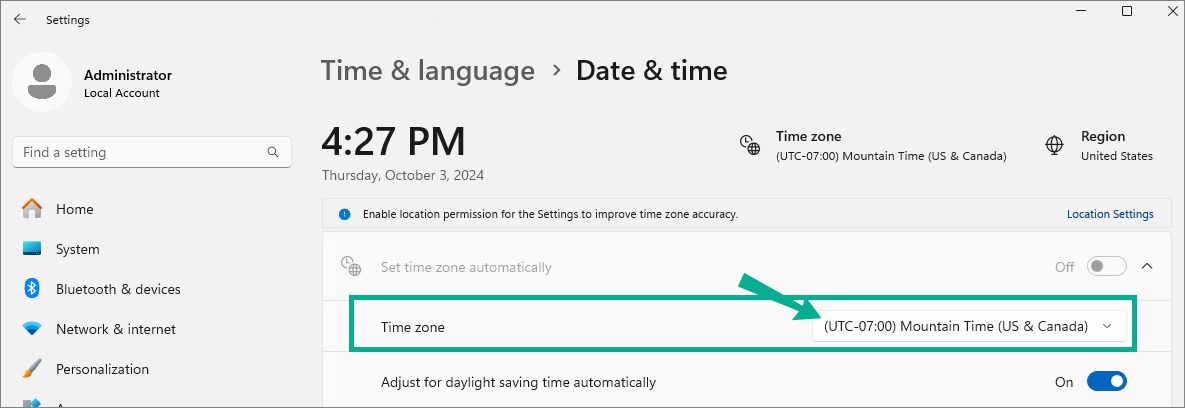
- Set the Time Zone
Use the drop-down menu under Time zone to select your preferred time zone

- Verify that the correct time is now displayed. You’re all set!
Related Articles
Installing Windows
Installing Windows If you are installing Windows to a laptop, be certain it is plugged in throughout this process. Run the installer using the media of your choice. Windows Setup: Select desired language and time format Click Next Click select ...
Configuring Windows
This article will walk you through configuring Windows for use as a migration workstation. We recommend a fresh installation of windows. Configuring Windows Click the Start Menu Unpin everything except the following, by right clicking and choosing ...
Configuring Windows Updates
Keeping your system updated is essential for maintaining security, performance, and compatibility with the latest features. In this article, we’ll walk you through how to configure Windows Update settings for a migration workstation. Open Settings ...
How to Activate Windows
Let's get Windows activated. Open Settings Click the Start button and type Settings Click Open Go to System Scroll down and click on Activation On Change product key Click Change Enter your key XXXXX-XXXXX-XXXXX-XXXXX-XXXXX Click Next Click Activate ...
Enabling Long Paths in Windows
By default, Windows limits file paths to 260 characters, which can cause issues when working with deeply nested directories or long file names. In this article we will enable long paths by adjusting a simple Group Policy setting. Click Start and type ...